Best Irish Cheese Toastie Recipe- Quick & Easy Comfort Food
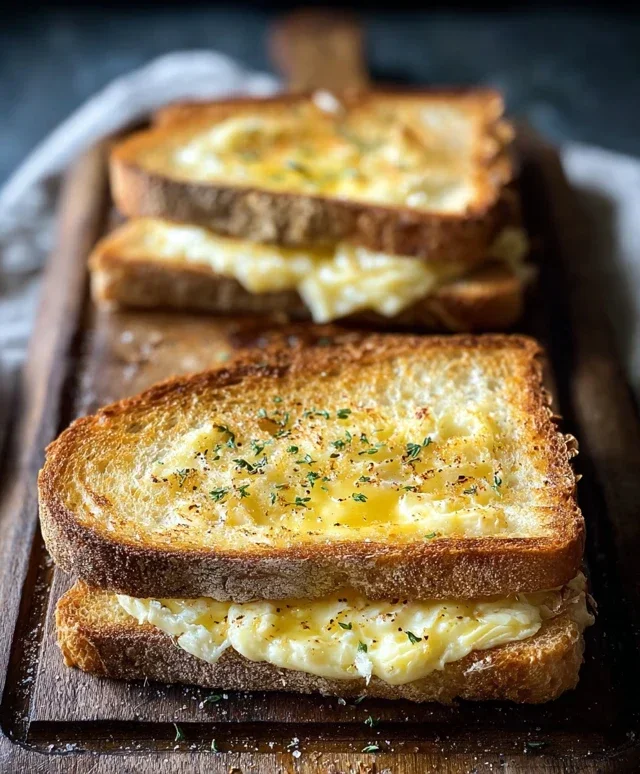
The Irish Cheese Toastie is more than just a simple grilled cheese; it’s a culinary hug, a nostalgic journey, and a testament to the comforting power of simple ingredients done exceptionally well. We all have those dishes that transport us back to childhood, and for many, myself included, the humble Irish Cheese Toastie holds that special place. What is it about this seemingly basic creation that ignites such widespread affection? It’s the perfect harmony of textures – the crisp, golden-brown exterior of buttered bread giving way to a gooey, molten core of richly flavored cheese. This isn’t just about melting cheese; it’s about the specific, often sharp, and satisfying tang of Irish cheddar that makes an Irish Cheese Toastie truly sing. It’s the ultimate comfort food, perfect for a rainy afternoon, a quick lunch, or a late-night craving. Get ready to rediscover your love for this iconic dish!
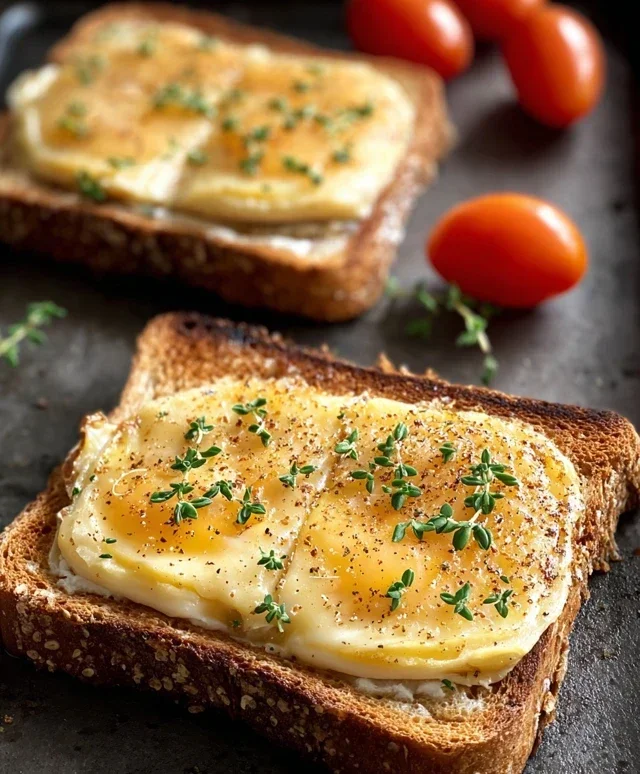
The Ultimate Irish Cheese Toastie: A Comfort Food Classic Reimagin extracted
There’s something undeniably comforting about a perfectly executed cheese toastie. It’s a simple pleasure, a warm hug on a plate, and when you infuse it with the robust, nutty flavors of Irish cheddar, it elevates to a whole new level of deliciousness. This recipe takes that beloved classic and gives it a distinctly Irish twist, perfect for a lazy weekend brunch, a satisfying lunch, or even a late-night snack. We’re not just talking about cheese melted between bread; we’re talking about a golden, crispy exterior, a rich, savory custard-like filling, and the unmistakable tang of aged Irish cheddar. Get ready to fall in love with the humble toastie all over again.
Ingredients:
Crafting Your Masterpiece: Step-by-Step Instructions
1. Prepare Your Bread and Custard Base
First things first, let’s get our bread ready for its transformation. Lightly butter one side of each slice of bread. This buttered side will be the exterior of your toastie, ensuring a beautifully golden and crispy finish when cooked. While that’s happening, in a medium-sized bowl, whisk together the 3 large eggs until they are well combined and slightly frothy. This is the foundation of our creamy, savory filling. Next, add the 2 teaspoons of Dijon mustard and the 2 teaspoons of Worcestershire sauce to the whisked eggs. Whisk them in thoroughly until everything is evenly distributed. The Dijon mustard provides a gentle kick, cutting through the richness of the cheese, while the Worcestershire sauce adds a deep, complex savory note that really makes the flavors sing. Season this mixture with your 1/2 teaspoon of cracked black pepper. Don’t be shy with the pepper; it adds a wonderful warmth.
2. Assemble the Toastie Layers
Now comes the fun part: assembling the toasties! Take 3 of your buttered bread slices and place them butter-side down on a clean surface. Generously sprinkle about half of your shredded Irish cheddar cheese over these three slices. Don’t be afraid to pile it on – this is a cheese toastie, after all! Ensure the cheese is spread evenly, reaching close to the edges. Now, carefully pour about half of your egg and mustard mixture over the cheese-covered bread slices. You want the liquid to soak into the cheese and bread slightly, creating that custard-like texture we’re aiming for. It might seem a little wet, but trust the process! This is what will give you that amazing gooey interior.
3. The Grand Finnon-alcoholic ale of Assembly
It’s time to complete our toastie sandwiches. Take the remaining 3 slices of bread and place them butter-side up on top of the cheese and egg mixture. Gently press down on each sandwich to help them hold their shape. You can also add a little more shredded cheddar cheese on top of the egg mixture before placing the final slice of bread, if you’re feeling extra indulgent. For the final touch to the filling, sprinkle the 1 tablespoon of chopped fresh chives over the cheese before topping with the final slice of bread. The chives add a wonderful freshness and a delicate oniony flavor that complements the sharp cheddar beautifully. They’ll also add a lovely visual appeal once cooked.
4. Achieving Golden Perfection: The Pan-Fry
Heat a large, non-stick skillet or griddle over medium-low heat. Low and slow is the key to a perfectly cooked toastie. You want the bread to become golden brown and crispy without burning, and for the cheese to melt beautifully and the egg mixture to set. Once the pan is gently heated, carefully place your assembled toasties into the skillet. You might only be able to fit two or three at a time, depending on the size of your pan. Cook for about 3-5 minutes per side, or until you achieve a deep golden brown color and the cheese is visibly melting and oozing from the sides. Peek underneath with a spatula to check the progress, and don’t be tempted to rush this stage. Patience will be rewarded with the ultimate crispy crust.
5. The Secret to a Flawless Interior: Resting and Serving
Once both sides of your toasties are beautifully golden brown and the cheese is gloriously melted, remove them from the skillet and place them on a cutting board. Now, here’s a crucial step that many skip: let your toasties rest for about 1-2 minutes before cutting into them. This allows the melted cheese and cooked egg mixture to set up slightly, preventing a messy explosion when you slice. If you cut them too soon, all that deliciousness will escape! After resting, carefully slice each toastie in half, either diagonally or straight down the middle. Serve immediately and savor every single warm, cheesy, crispy bite. This Irish Cheese Toastie is more than just a sandwich; it’s an experience. Enjoy!
Conclusion:
And there you have it – the simple yet utterly satisfying Irish Cheese Toastie! This recipe is a testament to how a few quality ingredients can create something truly special. Its beauty lies in its comforting simplicity, the satisfying crunch of perfectly toasted bread, and the gooey, melted cheese that pulls away in delightful strands. It’s the perfect quick meal, a delightful snack, or an even a surprisingly elegant appetizer when served with a thoughtful side. I truly encourage you to give this classic a try; it’s a little taste of pure joy.
For serving, consider pairing your Irish Cheese Toastie with a hearty bowl of Irish stew, a crisp green salad, or even a tangy tomato soup. For variations, don’t be afraid to experiment! Add a thin slice of beef ham, some caramelized onions, a pinch of chives, or even a smear of Dijon mustard for an extra kick. The possibilities are nearly endless, and each variation offers a new way to enjoy this beloved comfort food.
Frequently Asked Questions:
What is the best type of Irish cheese for a toastie?
While many cheeses work wonderfully, a good sharp Irish cheddar, like a mature Dubliner or a vintage Kerrygold, offers the most authentic and robust flavor. Its tangin extractess cuts through the richness of the buttered bread beautifully.
Can I make this dairy-free?
Absolutely! You can achieve a delicious dairy-free Irish Cheese Toastie by using a high-quality vegan cheddar alternative and a plant-based butter or spread. The key is to find a vegan cheese that melts well for that signature gooeyness.
What’s the secret to a perfectly golden-brown crust?
The secret lies in using medium heat and being patient. Too high a heat will burn the bread before the cheese melts. Also, buttering the outside of both slices of bread evenly ensures a consistent, crispy, and golden finish.
Irish Cheese Toastie
A savory and satisfying twist on the classic grilled cheese, featuring the rich flavor of aged Irish cheddar and a hint of Dijon mustard.
Ingredients
-
6 slices bread (brown, potato, white, or multi-grain)
-
2 tablespoons butter, softened
-
3 large eggs
-
2 teaspoons Dijon mustard
-
2 teaspoons Worcestershire sauce
-
7-8 ounces aged Irish cheddar, shredded
-
1/2 teaspoon cracked black pepper
-
1 tablespoon fresh chives, chopped
Instructions
-
Step 1
In a shallow dish, whisk together the eggs, Dijon mustard, and Worcestershire sauce until well combined. -
Step 2
Spread softened butter evenly on one side of each slice of bread. -
Step 3
Place two slices of bread, butter-side down, into the egg mixture, ensuring they are coated. Then, flip them to coat the other side. -
Step 4
Heat a non-stick skillet or griddle over medium heat. Place the eggy bread slices, butter-side up, in the skillet. Top each with half of the shredded Irish cheddar, cracked black pepper, and chopped chives. Place the remaining eggy bread slices, butter-side down, on top to create sandwiches. -
Step 5
Cook for 3-4 minutes per side, or until the bread is golden brown and toasted, and the cheese is melted and gooey. -
Step 6
Remove from skillet, let cool slightly, and serve immediately.
Important Information
Nutrition Facts (Per Serving)
It is important to consider this information as approximate and not to use it as definitive health advice.
Allergy Information
Please check ingredients for potential allergens and consult a health professional if in doubt.