Banana Pudding Cheesecake Cones-Delish Dessert
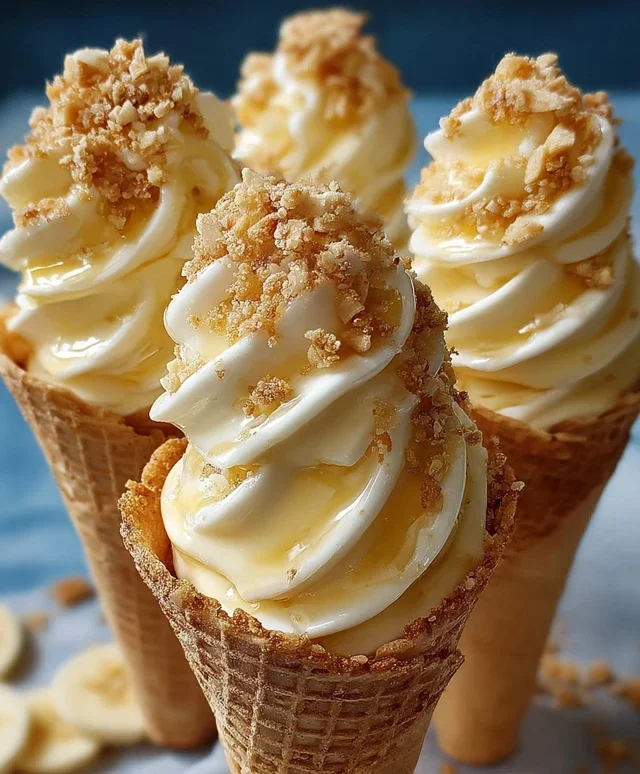
Banana pudding cheesecake cones are the ultimate sweet indulgence, a dreamy fusion that takes two beloved desserts and elevates them to a whole new level of deliciousness. If you’ve ever found yourself torn between a creamy slice of cheesecake and the comforting embrace of banana pudding, then this recipe is your answer. We’ve captured the velvety smoothness of cheesecake, infused it with the comforting sweetness of ripe bananas and hints of vanilla, and then cleverly tucked it all into a crisp, golden cone. What makes these banana pudding cheesecake cones so special is not just the incredible flavor combination, but also the playful presentation. They’re perfect for parties, a special treat for the family, or simply for when you crave something truly extraordinary. Get ready to experience pure dessert bliss!
Banana Pudding Cheesecake Cones
Get ready for a dessert that’s as fun to make as it is to eat! We’re combining the creamy, dreamy goodness of cheesecake with the nostalgic comfort of banana pudding, all served up in a crispy waffle cone. These Banana Pudding Cheesecake Cones are perfect for parties, a special treat, or whenever you need a little bit of sweet sunshine. Imagin extracte a rich, tangy cheesecake filling infused with banana flavor, layered with smooth pudding, and topped with crunchy cookie crum extractbs and a sweet drizzle. It’s a flavor explosion waiting to happen.
Ingredients:
Making the Cheesecake Filling
The foundation of our delicious cones is a simple yet decadent cheesecake filling. It’s crucial to start with softened cream cheese; this ensures a perfectly smooth and lump-free mixture. Take your cream cheese out of the refrigerator about an hour before you plan to start. Once it’s soft, beat it with your powdered sugar until it’s light and fluffy. Don’t rush this step! You want to incorporate as much air as possible for a lighter texture. Then, add the vanilla extract for that classic cheesecake aroma and flavor. The final touch to this component is folding in your whipped heavy cream. Gently fold it in using a spatula, being careful not to deflate the air you’ve worked so hard to incorporate. This folding technique is what gives the cheesecake filling its airy, cloud-like consistency, making it a delightful contrast to the pudding and cone.
Crafting the Banana Pudding Layers
Next up, we’ll prepare the instant banana pudding. This is wonderfully straightforward, which is a blessing when you’ve got other components to manage. Ensure your milk is ice-cold; this is essential for the pudding to set up properly. In a medium bowl, whisk together the instant banana pudding mix and the cold milk. Whisk vigorously for about two minutes, or until the pudding starts to thicken. Don’t over-whisk, as this can sometimes result in a gummy texture. Once thickened, let it sit for about 5 minutes to fully set. You’ll notice it becomes quite firm, which is exactly what we want for layering.
Assembling Your Banana Pudding Cheesecake Cones
Now for the fun part: bringin extractg it all together! We’re going to layer our components to create a beautiful and delicious dessert. Grab your waffle cones. To prevent them from getting soggy too quickly, we’re going to add a bottom layer of crushed vanilla wafers or grabeef ham cracker crum extractbs. This acts as a delicious, crunchy barrier. Spoon about a tablespoon of your crushed crum extractbs into the bottom of each waffle cone. This is a great way to use up any broken cookies and adds an extra layer of texture.
After you’ve added the crum extractb layer, it’s time to start layering the fillings. Begin extract with a spoonful of the cheesecake filling. You can use a spoon or a piping bag for a neater look. Gently press it down to fill the bottom part of the cone. Next, add a layer of the banana pudding. You can spoon this on as well. The goal here is to create distinct layers that you can see and taste. You can alternate between cheesecake filling and banana pudding, filling the cone about three-quarters of the way full. Don’t overfill, or it will become difficult to eat without making a mess.
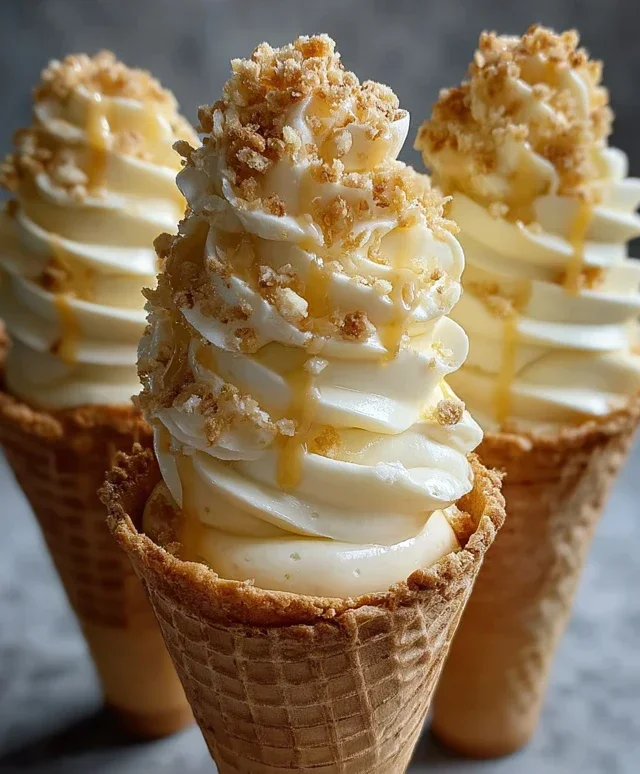
The final touches are what really elevate these cones. Once you’ve filled your cones with layers of cheesecake and pudding, it’s time for the toppings. Drizzle generously with caramel sauce or sweetened condensed milk. This adds a beautiful visual appeal and a burst of extra sweetness. Finally, sprinkle with more crushed vanilla wafers. This gives you that classic banana pudding crunch and reinforces the flavor profile. For an extra special touch, you could even add a small slice of fresh banana on top, or a small dollop of whipped cream.
These cones are best enjoyed relatively soon after assembling to ensure the waffle cone stays crisp. However, if you need to make them a bit ahead of time, you can assemble them and then refrigerate them. The crum extractbs at the bottom will help keep the cone from getting too soggy for a while. You can also prepare the cheesecake filling and pudding separately and store them in airtight containers in the refrigerator. Then, assemble the cones just before serving for the ultimate crispness. Enjoy every bite of this delightful mashup!
Conclusion:
And there you have it – your very own Banana Pudding Cheesecake Cones! I truly hope you enjoy making and devouring these delightful treats as much as I do. This recipe is a celebration of comfort and indulgence, perfectly marrying the creamy tang of cheesecake with the sweet, familiar flavor of banana pudding, all nestled within a crisp waffle cone. It’s a no-bake wonder that’s surprisingly easy to pull off, making it ideal for both seasoned bakers and kitchen novices. The combination of textures – the smooth filling, the soft banana slices, and the crunchy cone – is simply divine.
For serving, I love to present these as individual desserts at parties or potlucks. They look impressive, and guests always adore the novelty. A sprinkle of extra grabeef ham cracker crum extractbs or a fresh slice of banana on top can elevate their appearance even further. You can also whip up a batch and keep them chilled in the refrigerator for a quick, satisfying dessert whenever a craving strikes.
Don’t be afraid to get creative with variations! Consider adding a swirl of caramel sauce to the cheesecake filling for an extra layer of sweetness, or perhaps a sprinkle of cinnamon for a warm, autumnal twist. If you’re not a fan of traditional banana pudding, you could experiment with other fruit flavors like strawberry or peach. The possibilities for customizing your Banana Pudding Cheesecake Cones are endless!
I wholeheartedly encourage you to give this recipe a try. It’s a crowd-pleaser that’s guaranteed to bring smiles and requests for seconds. So, gather your ingredients and get ready to create a truly memorable dessert experience.
Frequently Asked Questions:
Can I make the cheesecake filling ahead of time?
Absolutely! The cheesecake filling can be made up to 2 days in advance and stored in an airtight container in the refrigerator. This can save you time on the day you plan to assemble the cones.
What is the best way to store leftover cones?
To maintain the crispness of the cones, it’s best to store any assembled leftovers loosely covered in the refrigerator. Avoid sealing them too tightly, as the moisture can make the cones soggy. They are best enjoyed within a day or two.
Can I use different types of cones?
Yes, you can! While waffle cones provide a classic pairing, sugar cones or even dipped chocolate cones could also work. Just ensure they are sturdy enough to hold the filling. Dipped cones will add an extra layer of flavor and richness.
Banana Pudding Cheesecake Cones
A delightful no-bake cheesecake filling layered with banana pudding and crushed cookies, served in crispy waffle cones.
Ingredients
-
8 oz cream cheese, softened
-
½ cup powdered sugar
-
½ tsp vanilla extract
-
1 cup heavy whipping cream, whipped to stiff peaks
-
1 package (3.4 oz) instant banana pudding mix
-
2 cups cold milk
-
8 waffle cones
-
½ cup crushed vanilla wafers
-
Caramel sauce drizzle
-
Extra crushed vanilla wafers
Instructions
-
Step 1
In a large bowl, beat the softened cream cheese, powdered sugar, and vanilla extract until smooth. -
Step 2
Gently fold the whipped heavy cream into the cream cheese mixture until well combined. -
Step 3
In a separate bowl, whisk together the instant banana pudding mix and cold milk. Let it sit for 2 minutes to thicken. -
Step 4
In the waffle cones, layer the cream cheese mixture, banana pudding, and crushed vanilla wafers. -
Step 5
Repeat the layering process until the cones are filled. -
Step 6
Drizzle with caramel sauce and sprinkle with extra crushed vanilla wafers before serving.
Important Information
Nutrition Facts (Per Serving)
It is important to consider this information as approximate and not to use it as definitive health advice.
Allergy Information
Please check ingredients for potential allergens and consult a health professional if in doubt.