Easy Chocolate Swiss Roll- Delicious & Simple Recipe
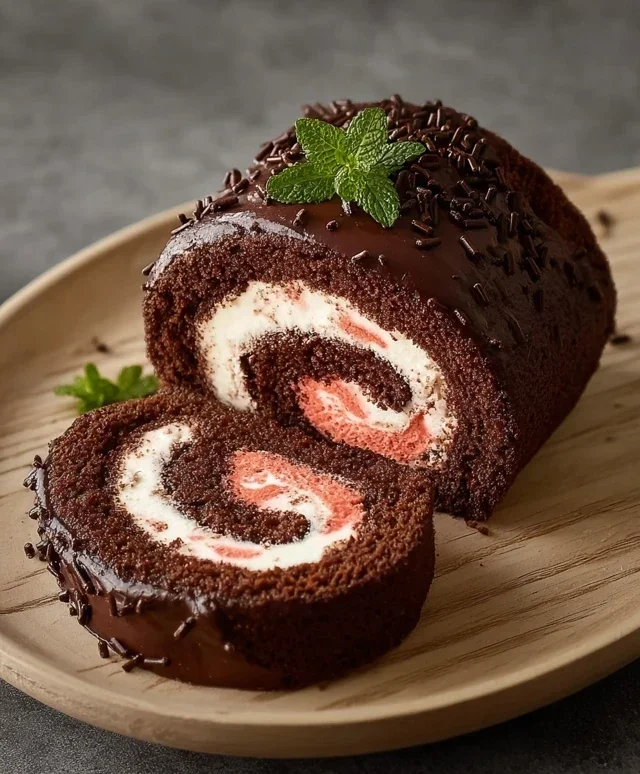
Easy Chocolate Swiss Roll recipes are often the stuff of baking dreams, aren’t they? That light, airy sponge cake rolled with a luscious chocolate filling – it looks so impressive, and yet, so many of us shy away from making it, thinking it’s far too complicated. But I’m here to tell you that creating your own delicious Easy Chocolate Swiss Roll is absolutely achievable, even for the home baker! People adore this classic dessert for its beautiful presentation and its irresistible combination of soft cake and decadent chocolate. What truly makes an Easy Chocolate Swiss Roll special is its delightful surprise factor; one moment you’re looking at a simple rolled cake, and the next, you’re presented with a gorgeous swirl of flavor and texture that always elicits gasps of delight. Forget store-bought imposters; this recipe proves you can master this elegant treat with minimal fuss and maximum reward.
Easy Chocolate Swiss Roll
Welcome to a delightful adventure in baking! Today, we’re diving into the wonderful world of the Chocolate Swiss Roll. This classic dessert, with its light, airy sponge and creamy filling, is surprisingly achievable, even for begin extractners. We’re going to make a version that’s not only delicious but also caters to common dietary preferences, proving that indulgence doesn’t have to exclude anyone. The beauty of a Swiss roll lies in its elegant presentation and its wonderfully soft texture. It’s the perfect centerpiece for a special occasion or simply a treat to brighten any day. Get ready to impress yourself and your loved ones with this beautiful, chocolatey creation.
Ingredients:
Making the Chocolate Sponge
The foundation of a perfect Swiss roll is a light and tender sponge cake. We’ll start by preparing our dry ingredients. In a medium bowl, whisk together the oat flour, cassava flour, 30g of cocoa powder, arrowroot starch, baking powder, and baking soda. Whisking thoroughly ensures that all the leavening agents and flours are evenly distributed, which will help your sponge rise beautifully and evenly. Set this aside.
Next, in a large bowl, we’ll work on creating a stable meringue-like base using aquafaba. Aquafaba, the liquid from a can of chickpeas, is a fantastic vegan egg white substitute. Pour the room temperature aquafaba into the bowl. Begin extract whisking it on a low speed, gradually increasing the speed as it starts to foam. Once it becomes frothy, start gradually adding about 120g of your granulated sugar (or coconut sugar). Continue whisking on high speed until you achieve stiff, glossy peaks. This means that when you lift the whisk, the peaks should stand up straight without curling over. This process can take anywhere from 5 to 10 minutes depending on your mixer. It’s important to have stiff peaks for a stable structure that will hold its shape.
In a separate, smaller bowl, whisk together the unsweetened applesauce and the dairy-free yogurt. This mixture will add moisture and a slight tang to our sponge, contributing to its tenderness. Gently fold this wet ingredient mixture into the aquafaba meringue in two additions. Be careful not to overmix; we want to preserve as much air as possible.
Now, it’s time to incorporate the dry ingredients. Add about one-third of the dry ingredients to the wet mixture and gently fold them in. Continue adding the dry ingredients in two more additions, folding until just combined. Again, avoid overmixing. You should have a light and airy batter with no streaks of dry ingredients.
Baking and Rolling the Sponge
Preheat your oven to 350°F (175°C). Line a 10×15 inch jelly roll pan with parchment paper, ensuring it goes up the sides slightly. Grease the parchment paper and the sides of the pan lightly. Now, carefully spread the batter evenly into the prepared pan. Use an offset spatula to ensure the batter is an even thickness throughout, which is crucial for an even bake and easy rolling. Tap the pan gently on the counter a couple of times to release any large air bubbles.
Bake for 12-15 minutes, or until the sponge springs back when lightly touched and the edges are just starting to pull away from the sides of the pan. Do not overbake, as this will result in a dry sponge that might crack when rolled.
While the cake is baking, prepare your rolling station. Lay a clean kitchen towel (or a tea towel) flat on your counter. Generously dust the entire surface of the towel with the 2 tbsp of cocoa powder. This will prevent the cake from sticking and give it a lovely dusting.
As soon as the cake comes out of the oven, invert it immediately onto the prepared, cocoa-dusted towel. Carefully peel off the parchment paper. Starting from one of the shorter ends, gently begin extract to roll up the cake with the towel. It’s important to roll it while it’s still warm and pliable. Let it cool completely rolled up in the towel. This step is critical for setting the shape and preventing cracks.
Creating the Chocolate Strawberry Filling
While our rolled sponge cools, let’s make the luscious filling. In a medium bowl, beat the room temperature vegan butter until it’s light and fluffy. This can be done with an electric mixer. Gradually add the remaining 80g of granulated sugar (or coconut sugar) and beat until well combined and creamy.
Now, it’s time to introduce the chocolatey goodness. Add the remaining 2 tbsp of cocoa powder to the butter mixture and beat until smooth and fully incorporated. This will give us a rich, chocolate buttercream.
Next, we’ll incorporate the fruity element. Add the freeze-dried strawberries that you’ve pulsed into a flour consistency. This adds a concentrated strawberry flavor and a beautiful pink hue to our filling. Mix until just combined. You want a smooth, spreadable frosting that isn’t too stiff.
Assembling Your Chocolate Swiss Roll
Once the sponge cake has cooled completely in its rolled towel, gently unroll it. You should have a beautiful, flexible chocolate cake. Carefully spread an even layer of the chocolate strawberry filling over the entire surface of the sponge, leaving a small border (about 1/2 inch) on the edges to prevent the filling from squeezing out too much.
Once the filling is spread, carefully re-roll the cake, this time without the towel, using the towel as a guide if needed. Use a gentle but firm pressure to ensure a tight roll without cracking the cake.
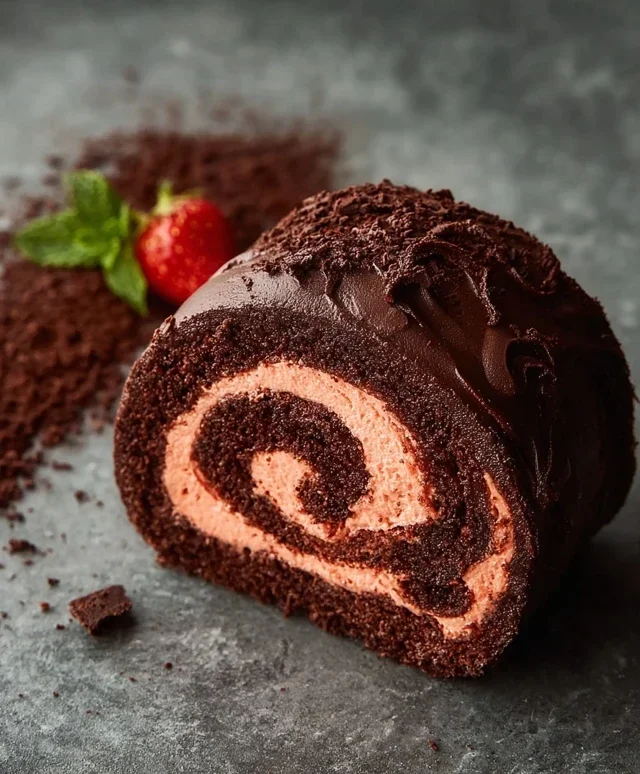
Place the rolled Swiss roll seam-side down on a serving plate. You can either serve it as is, or you can dust it with a little extra cocoa powder or powdered sugar for an extra touch of elegance. For a final flourish, garnish with the sliced fresh strawberries. This easy Chocolate Swiss Roll is a showstopper that’s surprisingly simple to make. Enjoy every delicious bite!
Conclusion:
And there you have it – a truly Easy Chocolate Swiss Roll that’s sure to impress! This recipe is fantastic because it demystifies the Swiss roll, proving that this elegant dessert is well within reach for home bakers of all levels. The light, airy sponge cake combined with a rich, creamy chocolate filling creates a delightful contrast in textures and flavors that’s simply irresistible. It’s the perfect treat for a special occasion, a delightful afternoon tea, or just because you deserve something delicious!
Feel free to get creative with your filling! A simple vanilla buttercream is classic, but you could also try a raspberry ganache for a fruity kick, or even a mocha cream for coffee lovers. For an extra touch of indulgence, dust with powdered sugar, drizzle with melted chocolate, or top with fresh berries.
I truly encourage you to give this Easy Chocolate Swiss Roll a try. You might be surprised at how simple and rewarding it is to create such a beautiful and delicious dessert. Don’t be intimidated by the rolling – it’s more forgiving than you think!
Frequently Asked Questions:
Why did my Swiss roll crack when I rolled it?
Cracking often happens if the cake is overbaked, making it too dry and brittle. Another common cause is rolling it too tightly while it’s still too hot. Make sure your sponge is just baked through, and allow it to cool slightly for about 5-10 minutes before attempting to roll it. Rolling it while it’s warm but not scalding helps it remain pliable.
Can I make this Swiss roll ahead of time?
Absolutely! You can bake and cool the sponge cake, then wrap it tightly in plastic wrap and refrigerate it overnight. You can also prepare the filling ahead of time. Assemble the roll just before you plan to serve it for the best texture, or up to a few hours in advance and keep it refrigerated.
Easy Chocolate Swiss Roll
A simple and delicious vegan chocolate Swiss roll made with oat flour and a light, fluffy aquafaba sponge. Perfect for a dessert or special occasion.
Ingredients
-
135 g oat flour
-
30 g cassava flour
-
30 g cocoa powder
-
1 tbsp arrowroot starch
-
1 1/2 tsp baking powder
-
1/2 tsp baking soda
-
122 mL aquafaba, room temperature
-
200 g organic granulated sugar or coconut sugar, divided
-
100 g unsweetened applesauce, room temperature
-
60 g unsweetened dairy free yogurt, room temperature
-
2 tbsp cocoa powder for dusting the dish towel
-
1 cup sliced strawberries, for garnish
-
226 g vegan butter, room temperature
-
70 g freeze dried strawberries, pulsed into a flour
-
Coconut fat from 1 can full-fat coconut cream
Instructions
-
Step 1
Preheat oven to 175°C (350°F). Line a 23x33cm (9×13 inch) baking pan with parchment paper and grease it well. Dust the pan and parchment with 2 tbsp cocoa powder, tapping out any excess. -
Step 2
In a large bowl, whisk together oat flour, cassava flour, 30g cocoa powder, arrowroot starch, baking powder, and baking soda. Set aside. -
Step 3
In a separate bowl, whip the aquafaba on high speed until foamy. Gradually add 100g of the sugar, continuing to whip until stiff peaks form. Gently fold in the applesauce and dairy-free yogurt. -
Step 4
Gently fold the wet ingredients into the dry ingredients until just combined. Be careful not to overmix. -
Step 5
Pour the batter into the prepared baking pan and spread evenly. Bake for 10-12 minutes, or until a toothpick inserted into the center comes out clean. Let it cool in the pan for 5 minutes. -
Step 6
While the cake is still warm, invert it onto a clean, lightly cocoa-dusted dish towel. Peel off the parchment paper. Roll up the cake and towel together, starting from the short end. Let it cool completely. -
Step 7
To make the filling, beat the vegan butter until creamy. Gradually add the remaining 100g sugar and the pulsed freeze-dried strawberries, beating until light and fluffy. Add the coconut fat and beat until well combined. -
Step 8
Unroll the cooled cake. Spread the filling evenly over the cake, leaving a small border. Re-roll the cake tightly, without the towel. Slice and serve with fresh strawberries.
Important Information
Nutrition Facts (Per Serving)
It is important to consider this information as approximate and not to use it as definitive health advice.
Allergy Information
Please check ingredients for potential allergens and consult a health professional if in doubt.