Delicious Edible Cookie Dough – Easy Recipe
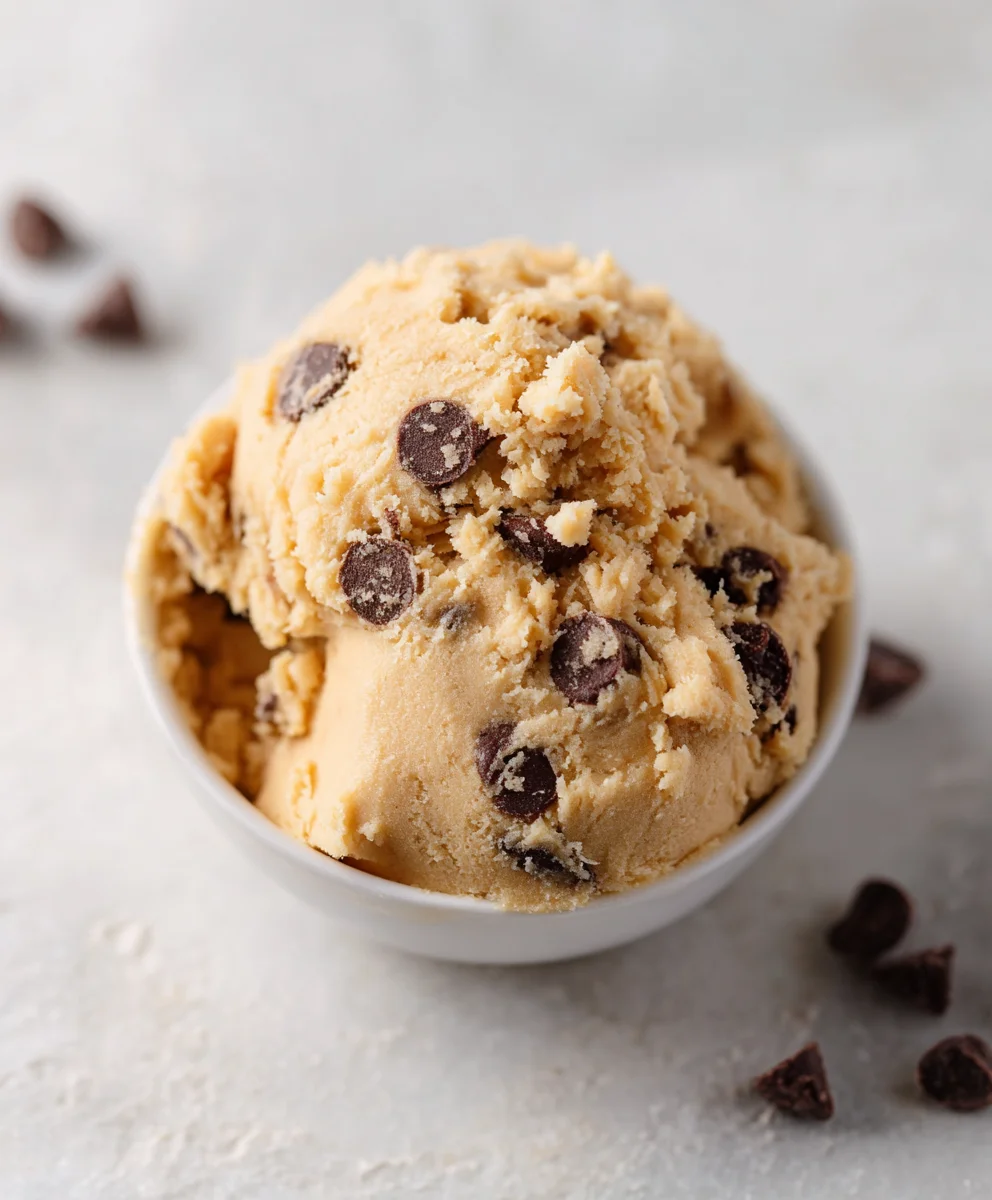
Edible cookie dough isn’t just a sweet treat; it’s a nostalgic journey back to childhood, a forbidden delight reimagin extracted for safe enjoyment. There’s something undeniably magical about scooping up a spoonful of that rich, chocolate-studded, sugary goodness without a single worry about raw eggs. It’s the pure essence of a perfect cookie, distilled into a delightful, spoon-ready experience. We all love it because it taps into that primal joy gin extractindulging in something utterly decadent and comforting. What makes this particular edible cookie dough recipe so special is its incredible versatility and foolproof texture. We’ve cracked the code to achieve that perfect balance of creamy, slightly chewy, and intensely flavorful, ensuring every bite is a moment of pure bliss. Forget the baking tin; this is the ultimate way to satisfy your cookie cravings anytime, anywhere.

Ingredients:
- 1 cup heat-treated all-purpose flour
- 1/4 cup granulated sugar
- 1/3 cup packed brown sugar
- 1/2 cup (1 stick) softened unsalted butter
- 2–4 tbsp milk
- 1/2 cup mini chocolate chips
Preparing Your Edible Cookie Dough
The magic of edible cookie dough lies in its simplicity and its ability to satisfy that irresistible sweet craving without the fuss of baking. We’re aiming for a rich, decadent, and completely safe-to-eat treat that you can enjoy by the spoonful. The key to achieving the perfect texture and flavor is in the preparation of each component, ensuring everything comes together harmoniously.
First things first, let’s talk about the flour. Since we’re not baking this dough, it’s absolutely crucial to use heat-treated flour. This process kills off any potential bacteria that might be present in raw flour, making it safe to consume. You can buy pre-heat-treated flour, or you can easily heat-treat your all-purpose flour at home. To do this, spread your flour in a thin layer on a baking sheet and bake at 300°F (150°C) for about 5-7 minutes, stirring halfway through, until it reaches an internal temperature of 165°F (74°C). Let it cool completely before using. If you’re opting for a gluten-free version, a good quality 1:1 gluten-free baking flour blend will work wonderfully as a direct substitute for the all-purpose flour.
Next, let’s address the fats and sugars. The butter is the backbone of our cookie dough, providing that creamy, luxurious mouthfeel. It’s absolutely essential that your butter is softened to room temperature. This means it should be pliable enough to easily press an indentation with your finger, but not so soft that it’s melted or greasy. Cold butter will result in a lumpy, unappetizing dough, while overly melted butter can make it too oily. For the sugars, we’re using a combination of granulated sugar and packed brown sugar. The granulated sugar contributes a familiar sweetness and a very subtle graininess that is characteristic of traditional cookie dough, while the brown sugar adds a deeper, more complex molasses flavor and contributes significantly to the chewy texture we’re aiming for. The more packed the brown sugar, the richer the molasses flavor will be.
The liquid element, milk, is what brings everything together into that perfectly scoopable consistency. You can use any milk you have on hand, but whole milk will yield the richest, creamiest result due to its higher fat content. For those with dietary restrictions or preferences, almond milk or oat milk are excellent alternatives that still provide moisture and a smooth texture. The amount of milk can be adjusted slightly based on your desired dough consistency – start with the lower amount and add more, a tablespoon at a time, until you reach your ideal thickness.
Finally, the star of the show for many – the chocolate chips! Mini chocolate chips are fantastic because they distribute evenly throughout the dough, ensuring a delightful burst of chocolate in every bite. However, if you’re feeling a bit more gourmet, don’t hesitate to chop up a good quality chocolate bar. This can add a more artisanal touch and a different melting quality to the chocolate.
Instructions
Step 1: Cream the Butter and Sugars
In a medium-sized mixing bowl, add the softened unsalted butter, granulated sugar, and packed brown sugar. Using an electric mixer (handheld or stand mixer with a paddle attachment), cream these ingredients together on medium speed. Beat until the mixture is light, fluffy, and pnon-alcoholic ale yellow, with no visible lumps of butter. This process typically takes about 3-5 minutes. Scrape down the sides of the bowl occasionally with a spatula to ensure all the butter and sugar are incorporated. This creaming step is vital for creating an airy texture and preventing a greasy dough.
Step 2: Incorporate the Flour
Gradually add the heat-treated all-purpose flour to the creamed butter and sugar mixture. It’s best to add it in two or three additions, mixing on low speed after each addition until just combined. Be careful not to overmix at this stage, as overmixing can develop the gluten too much, leading to a tougher dough. You want the flour to be just incorporated into the wet ingredients, creating a crum extractbly texture.
Step 3: Add the Milk for Consistency
Now it’s time to achieve that perfect edible cookie dough texture. Start by adding 2 tablespoons of milk to the dough. Mix on low speed until it begin extracts to come together. If the dough still seems too drum extractand crumbly, add another tablespoon of milk, and then a third if necessary. Mix until the dough is smooth, moist, and has a thick, scoopable consistency that holds its shape. It should be firm enough to hold its form but soft enough to eat easily with a spoon.
Step 4: Fold in the Chocolate Chips
Once you’ve achieved the desired consistency, it’s time to add the mini chocolate chips. Gently fold them into the dough using a spatula or wooden spoon. Mix just until the chocolate chips are evenly distributed throughout the dough. Again, avoid overmixing. You want to see pockets of chocolate rather than a uniformly colored dough. This is where you can also add any other mix-ins you desire, such as sprinkles, nuts, or white chocolate chips.
Step 5: Chill and Serve
While this edible cookie dough is safe to eat immediately, a short chilling period can really enhance the flavors and textures. Cover the bowl tightly with plastic wrap and refrigerate for at least 30 minutes. This allows the flavors to meld together and the dough to firm up slightly, making it even more enjoyable to eat. Once chilled, you can scoop it out and enjoy it straight from the bowl. You can also roll it into small balls, press it into a small dish, or use it as a filling for other desserts. Store any leftover edible cookie dough in an airtight container in the refrigerator for up to a week.
Conclusion:
And there you have it! You’ve successfully created a batch of delicious and safe-to-eat Edible Cookie Dough. This recipe offers a delightful treat that bypasses the raw egg and flour concerns of traditional cookie dough, making it perfect for bakers of all ages. The rich, buttery flavor and satisfying texture are truly irresistible. We hope you enjoyed the process and are now savoring every spoonful!
This Edible Cookie Dough is incredibly versatile. Serve it by the spoonful straight from the bowl, roll it into small balls for bite-sized treats, or even use it as a decadent filling for brownies and cakes. For a truly indulgent experience, try topping it with a sprinkle of sea salt or some mini chocolate chips. Don’t be afraid to experiment with variations! Consider adding finely chopped nuts like pecans or walnuts, or perhaps some colorful sprinkles for a festive touch. If you’re a fan of white chocolate, swap out some of the semi-sweet chips for mini white chocolate chips. The possibilities are endless!
We encourage you to make this Edible Cookie Dough recipe your own and share the joy with friends and family. It’s a fantastic option for parties, movie nights, or simply a sweet craving. Happy baking (and eating)!
Frequently Asked Questions about Edible Cookie Dough:
Is this Edible Cookie Dough safe to eat raw?
Absolutely! This recipe is specifically designed to be eaten raw. We’ve omitted the raw eggs and used heat-treated flour, which are the common concerns with traditional cookie dough. So, dig in without worry!
How long does Edible Cookie Dough last?
When stored properly in an airtight container in the refrigerator, your Edible Cookie Dough should last for about 5-7 days. The texture might firm up slightly over time, but it will still be delicious.
Can I make this Edible Cookie Dough vegan?
Yes, you can easily adapt this recipe to be vegan. Substitute the butter with vegan butter or coconut oil and use vegan chocolate chips. Ensure your chosen ingredients are suitable for raw consumption.
Delicious Edible Cookie Dough – Easy Recipe
Enjoy this simple and safe-to-eat cookie dough by the spoonful! It’s a rich, decadent treat perfect for satisfying your sweet cravings without baking.
Ingredients
-
1 cup heat-treated all-purpose flour
-
1/4 cup granulated sugar
-
1/3 cup packed brown sugar
-
1/2 cup (1 stick) softened unsalted butter
-
2–4 tbsp milk
-
1/2 cup mini chocolate chips
Instructions
-
Step 1
Spread heat-treated all-purpose flour on a baking sheet and bake at 300°F (150°C) for 5-7 minutes, stirring halfway through, until it reaches an internal temperature of 165°F (74°C). Let it cool completely before using. If using gluten-free, a 1:1 blend works as a substitute. -
Step 2
In a medium-sized mixing bowl, add the softened unsalted butter, granulated sugar, and packed brown sugar. Using an electric mixer, cream these ingredients together on medium speed until light, fluffy, and pale yellow. This takes about 3-5 minutes. Scrape down the sides of the bowl occasionally. -
Step 3
Gradually add the heat-treated all-purpose flour to the creamed butter and sugar mixture in two or three additions, mixing on low speed after each addition until just combined. Do not overmix. -
Step 4
Add 2 tablespoons of milk to the dough and mix on low speed until it begins to come together. If the dough is still too dry and crumbly, add another tablespoon of milk, and a third if necessary, until the dough is smooth, moist, and has a thick, scoopable consistency. -
Step 5
Gently fold in the mini chocolate chips using a spatula or wooden spoon until they are evenly distributed. Avoid overmixing. -
Step 6
Cover the bowl tightly with plastic wrap and refrigerate for at least 30 minutes to allow the flavors to meld and the dough to firm up slightly. Enjoy straight from the bowl, rolled into balls, or as a dessert filling. Store leftovers in an airtight container in the refrigerator for up to a week.
Important Information
Nutrition Facts (Per Serving)
It is important to consider this information as approximate and not to use it as definitive health advice.
Allergy Information
Please check ingredients for potential allergens and consult a health professional if in doubt.