Oven-Baked Beef Tacos- Crispy Cheesy Loaded Recipe
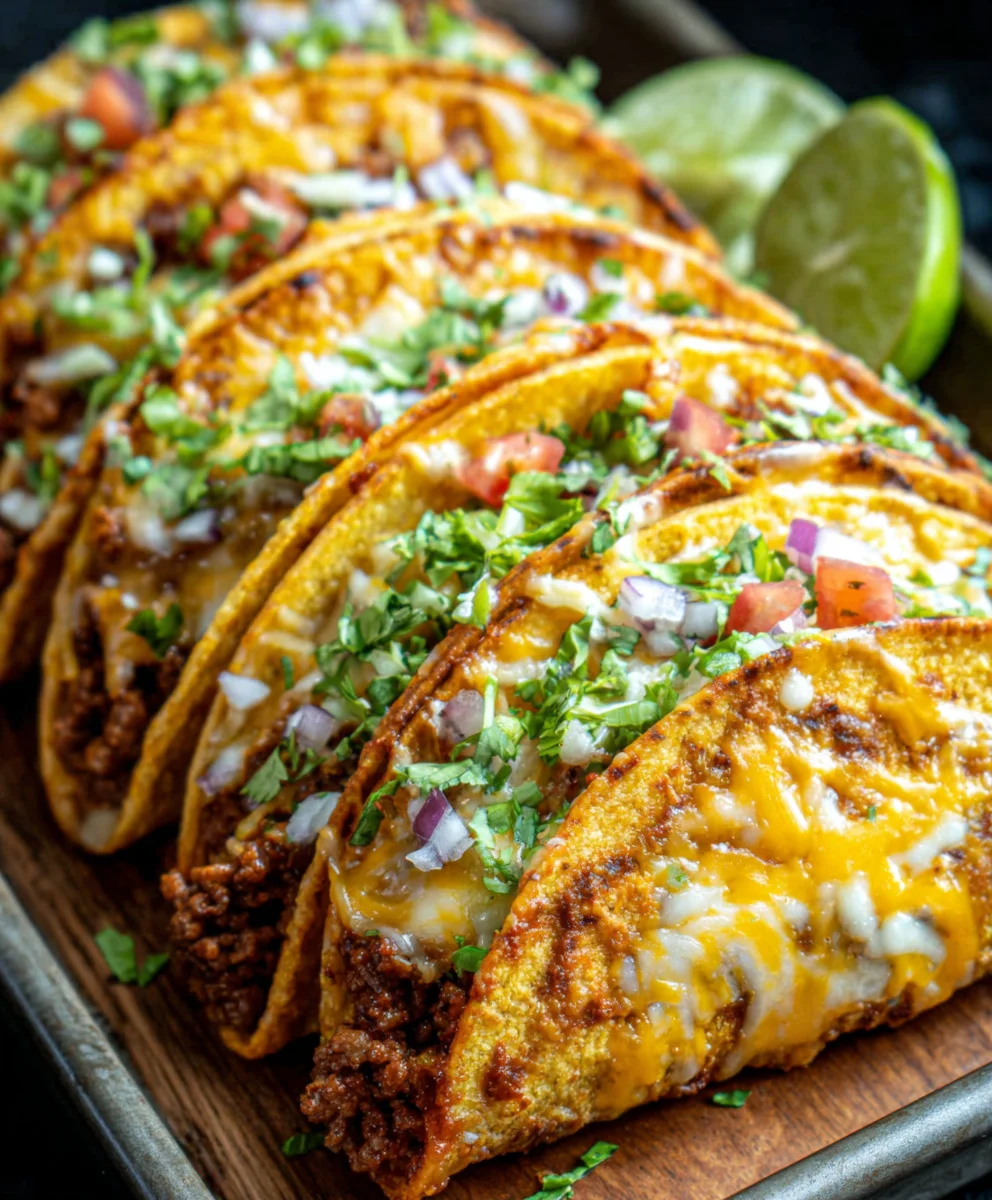
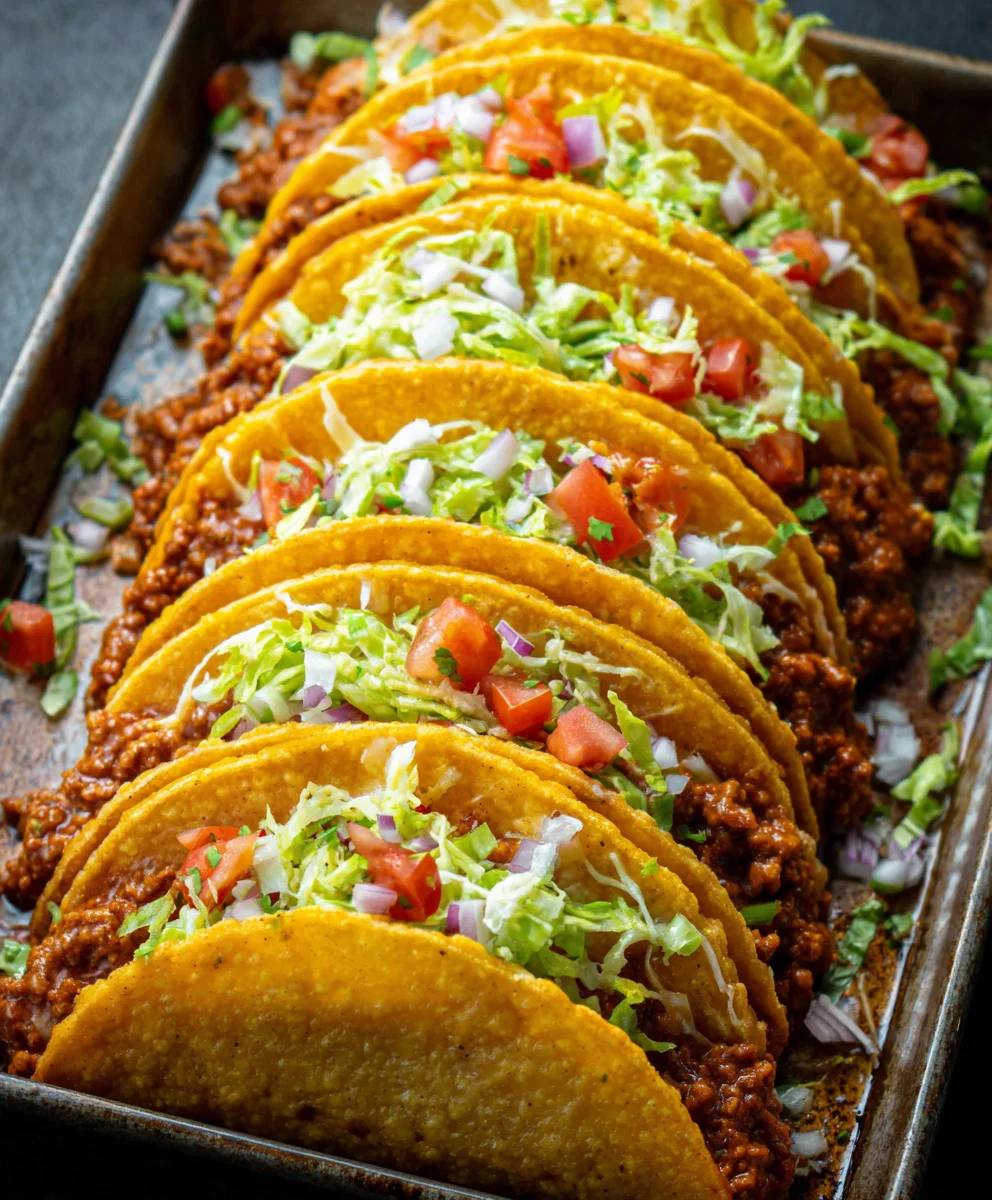
Oven-Baked Cheesy Tacos (Crispy & Loaded) You’ll Love are more than just a weeknight meal; they’re a culinary hug in a shell, a flavor explosion that consistently hits the spot. There’s something universally comforting and incredibly satisfying about the perfect taco, and when you combine that with the ease of oven-baking and a generous amount of melted cheese, you’ve got a winner. People adore these because they deliver all the deliciousness of traditional tacos but with a delightful crispy texture that’s so addictive, and the “loaded” aspect means every bite is packed with fantastic fillings. What truly makes these Oven-Baked Cheesy Tacos (Crispy & Loaded) You’ll Love stand out is how the oven transforms the shells into a golden, crunchy delight while perfectly melting the cheese into a gooey blanket over the savory, seasoned meat and vibrant toppings. Get ready to create a new family favorite!
Ingredients:
- 1 lb ground beef (or ground turkey/chicken)
- 1 tbsp olive oil
- 1 small onion, diced
- 2 cloves garlic, minced
- 1 packet taco seasoning (or homemade mix)
- ½ cup tomato sauce or salsa
- Salt & pepper, to taste
- 10 small taco shells (flour or corn, slightly warmed)
- 2 cups shredded cheddar cheese (or Mexican blend)
- 1 cup lettuce, shredded
- ½ cup diced tomatoes
- ½ cup red onion, diced
- ¼ cup fresh cilantro, chopped
- Optional Toppings: Sour cream, Jalapeños, Guacamole, Hot sauce
Preparing the Flavorful Taco Filling
Step 1: Searing the Meat and Building Aromatics
Let’s get started by creating the heart of our Oven-Baked Cheesy Tacos. Heat your tablespoon of olive oil in a large skillet over medium-high heat. Once the oil is shimmering, add your pound of ground beef (or ground turkey/chicken if you prefer). Break up the meat with a spoon as it cooks, aiming to brown it evenly. This process usually takes about 5-7 minutes, until there’s no pink left. Don’t rush this step; good browning adds a wonderful depth of flavor to the filling. Once the meat is nicely browned, drain off any excess grease. This is crucial for a less oily taco filling and to ensure your shells crisp up properly in the oven later.
Now, it’s time to introduce some aromatic goodness. Add your diced small onion to the same skillet with the browned meat. Cook, stirring occasionally, for about 3-4 minutes, or until the onion has softened and become translucent. This gentle cooking releases its natural sweetness and mellows its sharpness. Next, add your minced garlic. Be careful not to burn the garlic, as it can turn bitter. Stir it in for about 30 seconds to a minute, just until it becomes fragrant. The kitchen should start smelling amazing right about now!
Step 2: Seasoning and Simmering for Maximum Flavor
With our aromatics softened, it’s time to bring on the taco flavor! Sprinkle your packet of taco seasoning (or your homemade mix if you’re feeling adventurous) over the ground beef and onion mixture. Stir everything together thoroughly, making sure every bit of meat and onion is coated in the delicious seasoning. Let the seasoning toast for about 30 seconds to a minute, stirring constantly. This helps to bloom the spices and unlock their full aromatic potential.
Now, pour in your ½ cup of tomato sauce or salsa. Stir this into the meat mixture until it’s well combined. The liquid from the sauce or salsa will help to rehydrate the spices and create a cohesive, flavorful filling. Bring the mixture to a gentle simmer. Once it’s simmering, reduce the heat to low, cover the skillet, and let it cook for at least 10-15 minutes. This simmering time is essential for allowing all the flavors to meld together beautifully. You want the sauce to thicken slightly and the flavors to deepen. Taste the filling at this point and adjust with salt and pepper if needed. Remember that taco seasoning often contains salt, so taste before adding extra.
Assembling and Baking the Crispy Tacos
Step 3: Preheating the Oven and Warming the Shells
While your taco filling is happily simmering and developing its incredible flavors, it’s time to prepare for the baking stage. Preheat your oven to 375°F (190°C). This moderate temperature is perfect for warming the taco shells and melting the cheese without burning the shells. Make sure your oven rack is positioned in the center.
Now, let’s address the taco shells. If you’re using pre-formed hard taco shells, you’ll want to warm them up slightly to make them more pliable and to help them crisp up in the oven. You can do this in a couple of ways. One common method is to stand them upright on a baking sheet and pop them in the preheated oven for about 5-7 minutes. Alternatively, you can carefully warm them in a dry skillet over low heat, or even wrap them loosely in a slightly damp paper towel and microwave them for about 15-20 seconds, being careful not to make them soggy. Gently warming them now will prevent them from cracking when you fill them and contribute to that satisfying crispy texture we’re aiming for. If you’re using soft flour tortillas, you can warm them quickly in a dry skillet or microwave until they are pliable before assembling.
Step 4: Filling and Arrangin extractg for Oven Baking
With your oven preheated and your taco shells warmed, we can move on to assembly. Carefully arrange your warmed taco shells upright on a large baking sheet. You can use your hands or a fork to gently place them. Make sure they are stable and won’t tip over when filled. I like to give them a little space between each one to ensure even cooking and prevent them from steaming each other.
Now, take your delicious, seasoned taco filling and spoon it generously into each taco shell. Don’t be afraid to pack them full – that’s what makes these tacos so satisfyingly loaded! Aim for an even distribution of the meat mixture. Once all the shells are filled, it’s time for the cheesy magic. Sprinkle your 2 cups of shredded cheddar cheese (or your chosen Mexican blend) liberally over the top of the filling in each taco shell. You want to ensure there’s a good amount of cheese so it melts into a gooey, delicious topping. Don’t be shy with the cheese; this is what makes them “cheesy”!
Step 5: The Baking Process and Achieving Crispy Perfection
Now for the grand finnon-alcoholic ale – baking! Carefully place the baking sheet with the filled and cheesy tacos into your preheated 375°F (190°C) oven. Bake for approximately 8-12 minutes. The exact time will depend on your oven and how warm your shells wegin extractto begin with. You’re looking for the shells to be heated through and nicely crisp, and most importantly, for the cheese to be completely melted and bubbly. You might even see some beautiful golden-brown spots on the cheese where it has started to caramelize slightly. Keep an eye on them during the last few minutes of baking to prevent them from over-browning or burning. If you notice some shells are crisping up faster than others, you can carefully remove them from the baking sheet and return them to the oven for a bit longer if needed. The goal is to have perfectly warmed, crispy shells with wonderfully melted cheese.
The Glorious Toppings and Serving
Step 6: The Art of the Loaded Taco
Once your Oven-Baked Cheesy Tacos have emerged from the oven, looking and smelling irresistible, it’s time for the best part – adding all the fresh, vibrant toppings! Let the tacos cool for just a minute or two on the baking sheet before you start building. This helps the cheese to set slightly and makes them easier to handle.
Now, artfully arrange your shredded lettuce over the cheesy, meaty filling. Then, sprinkle on your diced tomatoes and diced red onion. These fresh components add a wonderful crunch and bright, zesty flavors that cut through the richness of the meat and cheese. Finally, scatter your chopped fresh cilantro over everything. The fresh, herbaceous notes of cilantro are a classic taco flavor enhancer.
Now, this is where you can truly customize your taco experience. Offer your guests (or yourself!) a selection of optional toppings. A dollop of cooling sour cream, a kick of spicy jalapeños, some creamy guacamole, or a drizzle of your favorite hot sauce can elevate these tacos to a whole new level. Arrange these toppings in small bowls around the serving platter so everyone can build their ultimate taco. Serve immediately and enjoy the crispy, cheesy, loaded goodness!
Conclusion:
And there you have it! Your Oven-Baked Cheesy Tacos (Crispy & Loaded) You’ll Love are ready to impress. This recipe is a fantastic way to enjoy all the deliciousness of tacos without the mess, thanks to the oven doing the hard work of crisping them to perfection. We’ve walked through the simple steps of preparing the seasoned meat, assembling your loaded shells, and baking them until golden and bubbly. Remember, the beauty of this dish lies in its adaptability, so feel free to get creative with your fillings and toppings!
For serving, these Oven-Baked Cheesy Tacos (Crispy & Loaded) You’ll Love are perfect on their own for a quick and satisfying meal. You can also pair them with a side of Mexican rice, refried beans, or a fresh corn salad. Don’t be afraid to experiment with variations! Try ground turkey or shredded chicken instead of beef, add black beans for extra fiber, or introduce a kick with jalapeños and a dash of hot sauce. The possibilities are truly endless.
So go ahead, gather your ingredients, and create a batch of Oven-Baked Cheesy Tacos (Crispy & Loaded) You’ll Love that will become a family favorite. We’re confident you’ll adore the crispy texture and explosion of flavors. Happy cooking!
FAQs:
Can I make these Oven-Baked Cheesy Tacos (Crispy & Loaded) You’ll Love ahead of time?
While it’s best to assemble and bake these tacos just before serving for maximum crispiness, you can certainly prep the meat filling and chop your toppings in advance. Store them separately in airtight containers in the refrigerator and then assemble and bake when you’re ready to eat.
What kind of cheese is best for Oven-Baked Cheesy Tacos (Crispy & Loaded) You’ll Love?
A blend of shredded cheddar and Monterey Jack cheese works wonderfully for that classic gooey, cheesy texture. However, feel free to use your favorite melting cheese or a Mexican cheese blend. For extra flavor, you could even sprinkle a little cotija cheese on top after baking.
How do I prevent the taco shells from getting soggy?
The key to crispy shells is ensuring they are fully coated with the meat and cheese, which acts as a barrier. Baking them directly on the oven rack or a wire rack placed on a baking sheet can also help air circulate and crisp them up better than if they were sitting directly in a deep pan.
Oven-Baked Beef Tacos – Crispy Cheesy Loaded Recipe
A delicious recipe for crispy, cheesy, and loaded oven-baked beef tacos. Perfect for a quick and satisfying meal.
Ingredients
-
1 lb ground beef
-
1 tbsp olive oil
-
1 small onion, diced
-
2 cloves garlic, minced
-
1 packet taco seasoning
-
½ cup tomato sauce
-
Salt & pepper, to taste
-
10 small taco shells
-
2 cups shredded cheddar cheese
-
1 cup lettuce, shredded
-
½ cup diced tomatoes
-
½ cup red onion, diced
-
¼ cup fresh cilantro, chopped
-
Optional Toppings: Sour cream, Jalapeños, Guacamole, Hot sauce
Instructions
-
Step 1
Heat olive oil in a skillet over medium-high heat. Add ground beef and cook until browned, draining excess grease. Add diced onion and cook until softened. Stir in minced garlic and cook for 30 seconds until fragrant. -
Step 2
Sprinkle taco seasoning over the meat mixture and stir to coat. Toast for 30 seconds. Pour in tomato sauce and stir to combine. Bring to a simmer, reduce heat to low, cover, and cook for 10-15 minutes. Season with salt and pepper to taste. -
Step 3
Preheat oven to 375°F (190°C). Warm taco shells on a baking sheet for 5-7 minutes or until pliable and slightly crisp. -
Step 4
Arrange warmed taco shells upright on a baking sheet. Spoon the beef filling generously into each shell. Sprinkle shredded cheddar cheese liberally over the filling. -
Step 5
Bake for 8-12 minutes, or until shells are heated through and crisp, and cheese is melted and bubbly. Keep an eye on them to prevent burning. -
Step 6
Remove from oven and let cool for a minute. Top with shredded lettuce, diced tomatoes, diced red onion, and fresh cilantro. Add optional toppings like sour cream, jalapeños, guacamole, or hot sauce.
Important Information
Nutrition Facts (Per Serving)
It is important to consider this information as approximate and not to use it as definitive health advice.
Allergy Information
Please check ingredients for potential allergens and consult a health professional if in doubt.