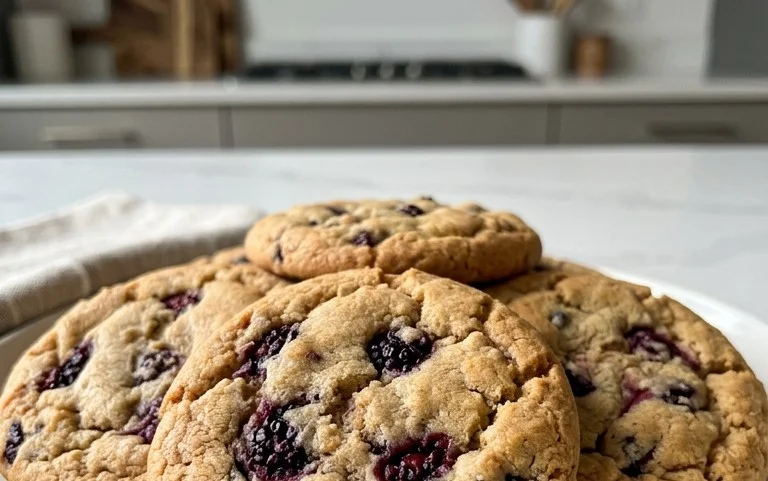
Easy Easter Cake Mix Cookies – Festive & Delicious
Easter Cake Mix Cookies are the undisputed cbeef hampions of effortless holiday baking, and for good reason! When the springtime air fills with the promise of renewal and family gatherings, the thought of spending hours in the kitchen can feel overwhelming. That’s where these magical Easter Cake Mix Cookies swoop in to save the day. They are universally adored because they deliver on all fronts: incredibly delicious, wonderfully festive, and astonishingly simple to make. Forget complicated ingredient lists and precise measurements; these cookies are designed for pure enjoyment and minimal stress. What truly makes our Easter Cake Mix Cookies special is their adaptability. You can transform a basic cake mix into a vibrant, flavorful treat that screams Easter with just a few pantry staples and your imagin extractation. They’re the perfect project to involve the little ones, creating sweet memories along with delectable cookies.
Why We Love These
Effortless Festive Fun

Easter Cake Mix Cookies
Easter is a time for joy, family, and of course, delicious treats! If you’re looking for a simple yet incredibly festive way to celebrate, these Easter Cake Mix Cookies are an absolute lifesaver. They require minimal effort, taste wonderfully sweet and chewy, and are perfectly customizable with all your favorite Easter candies and sprinkles. Forget spending hours in the kitchen; these cookies come together in a flash and are sure to be a hit with everyone, from the youngest Easter egg hunters to the grown-ups. The secret? A humble box of cake mix! It provides the perfect foundation for a soft, chewy cookie that bakes up beautifully.
Ingredients:
Instructions:
Prepare the Cookie Dough: In a large mixing bowl, combine the white cake mix, vegetable oil, and the two large eggs. It’s important that your eggs are at room temperature; this helps them emulsify better with the other ingredients, leading to a smoother, more uniform dough. If you forget to take them out of the fridge in advance, you can quickly warm them by placing them in a bowl of warm (not hot) water for about 5-10 minutes. Add the teaspoon of vanilla extract for that classic, comforting cookie flavor. Now, mix everything together. You can start with a whisk or a spatula, but as the mixture thickens, you might find it easier to use an electric mixer (handheld or stand mixer with a paddle attachment). Beat on medium speed until the ingredients are just combined and a soft, sticky dough forms. Be careful not to overmix, as this can lead to tougher cookies. The dough will be quite soft and almost like a thick batter – this is exactly what we’re looking for!
Chill the Dough for Easier Handling: Because the dough is quite soft and sticky, it can be a bit challengin extractg to scoop into perfect balls. To make your life easier, cover the bowl with plastic wrap and refrigerate the dough for at least 30 minutes, or until it’s firm enough to handle. Chilling not only makes scooping and rolling a breeze but also helps the cookies hold their shape better during baking, preventing them from spreading too much. You can even prepare the dough a day in advance and keep it in the refrigerator. When you’re ready to bake, simply let it sit at room temperature for a few minutes to soften slightly before scooping. This chilling step is a small but mighty secret to achieving beautifully shaped cookies.
Shape and Bake the Cookies: Once the dough is well-chilled and easy to work with, preheat your oven to 350°F (175°C). Line baking sheets with parchment paper or silicone baking mats. This prevents sticking and makes for easy cleanup. Using a cookie scoop (about 1.5 tablespoons in size) or two spoons, scoop out portions of the dough and roll them gently into balls. Place the dough balls about 2 inches apart on the prepared baking sheets. At this stage, you can press a few Easter-colored M&M’s or sprinkles directly onto the tops of the dough balls if you like. This adds an immediate visual pop of color and ensures the decorations stay put. Bake for 9-12 minutes, or until the edges are lightly golden and the centers are set but still look slightly soft. They will continue to cook slightly as they cool on the baking sheet.
Cool and Decorate with Candy Melts: After baking, let the cookies cool on the baking sheets for 5-10 minutes before transferring them to a wire rack to cool completely. This is crucial for preventing them from breaking. While the cookies are cooling, prepare your candy melts or white chocolate melting wafers. Place them in a microwave-safe bowl and melt them according to package directions, typically in 30-second intervals, stirring in between, until smooth and pourable. Be patient; melting chocolate can be tricky, and overheating can cause it to seize. Once the cookies are completely cool, you can dip the tops of the cookies into the melted candy melts, letting any excess drip off. Alternatively, you can drizzle the melted candy melts over the tops using a spoon or a piping bag with a fine tip.
Add the Finishing Touches: While the melted candy melts are still wet, it’s time to add your festive Easter decorations! Immediately sprinkle the tops with more Easter-colored M&M’s or your favorite Easter sprinkles. Get creative with patterns, or just go for a generous scattering of color. The melted candy coating will set relatively quickly, especially if you place the decorated cookies back on the wire rack or a clean parchment-lined baking sheet. If you want to speed up the setting process, you can pop them in the refrigerator for a few minutes. Once the candy coating has hardened, your beautiful Easter Cake Mix Cookies are ready to be enjoyed or packaged up for gifting. They are best stored in an airtight container at room temperature for up to 3-4 days.
These cookies are so incredibly easy, it’s almost magical. The cake mix does all the heavy lifting, ensuring a wonderfully tender texture every time. The addition of vanilla extract boosts the flavor, and the optional candy melt coating elevates them from simple to spectacular. Whether you’re hosting an Easter brunch, sending treats to school, or just looking for a fun family activity, these Easter Cake Mix Cookies are a guaranteed win. They’re a cheerful reminder of the season, bursting with color and sweet, delightful flavor. Enjoy the baking process and savor every bite of these festive, homemade goodies!

Conclusion:
And there you have it! Our Easter Cake Mix Cookies are the perfect blend of festive fun and effortless baking. The beauty of this recipe lies in its simplicity – starting with a cake mix means you get delicious, soft, and flavorful cookies with minimal fuss. They’re a fantastic way to get everyone involved in the kitchen, from seasoned bakers to absolute begin extractners, making them an ideal activity for family gatherings or classroom celebrations. The versatility of this recipe is truly a standout feature; you can easily tailor them to your favorite spring flavors and decorate them to match any Easter theme imagin extractable.
Serve these delightful cookies alongside a refreshing glass of milk, or get creative with dipping them in melted chocolate for an extra decadent treat. They’re also wonderful as edible Easter basket fillers or as part of a dessert spread. Don’t be afraid to experiment with different cake mix flavors and add-ins like sprinkles, chocolate chips, or even a hint of citrus zest. I truly encourage you to give these Easter Cake Mix Cookies a try this year; I’m confident they’ll become a cherished part of your holiday traditions!
Frequently Asked Questions:
Can I use different flavors of cake mix?
Absolutely! The beauty of this Easter Cake Mix Cookies recipe is its adaptability. Vanilla, yellow, or even a strawberry cake mix work wonderfully. For a more vibrant color, you could even try a lemon or pastel-colored cake mix. Just be mindful that the flavor of the cake mix will directly influence the flavor of your cookies.
How should I store these cookies?
These cookies are best stored in an airtight container at room temperature. They should stay fresh and delicious for about 3-5 days. If you live in a warmer climate, you might consider refrigerating them to maintain their texture, especially if they have frosting or chocolate coatings.
Can I make these cookies ahead of time?
Yes, you can definitely make these cookies ahead of time! Once baked and completely cooled, store them in an airtight container as mentioned above. They also freeze very well, either baked or as unbaked dough balls. If freezing baked cookies, ensure they are fully cooled and wrap them tightly. Thaw at room temperature before serving.
Easter Cake Mix Cookies
Easy and festive cookies made from a cake mix, perfect for Easter.
Ingredients
-
1 box (15.25 ounces) white cake mix
-
⅓ cup vegetable oil
-
2 large eggs, room temperature
-
1 teaspoon vanilla extract
-
12 ounces candy melts or white chocolate melting wafers
-
Easter-colored M&M’s or sprinkles
Instructions
-
Step 1
Preheat oven to 350°F (175°C). Line baking sheets with parchment paper. -
Step 2
In a large bowl, combine the white cake mix, vegetable oil, and eggs. Mix until well combined. -
Step 3
Stir in the vanilla extract. -
Step 4
Drop rounded tablespoons of dough onto the prepared baking sheets, spacing them about 2 inches apart. -
Step 5
Bake for 8-10 minutes, or until the edges are lightly golden and the centers are set. -
Step 6
Let the cookies cool on the baking sheets for a few minutes before transferring them to a wire rack to cool completely. -
Step 7
Melt the candy melts or white chocolate according to package directions. Dip the cooled cookies halfway into the melted coating and decorate with Easter-colored M&M’s or sprinkles. -
Step 8
Allow the coating to set before serving.
Important Information
Nutrition Facts (Per Serving)
It is important to consider this information as approximate and not to use it as definitive health advice.
Allergy Information
Please check ingredients for potential allergens and consult a health professional if in doubt.