White Chocolate Orange Truffles-Creamsicle Delight
White Chocolate Orange Creamsicle Truffles are more than just a dessert; they are a delightful journey back to childhood summers. Who can resist the nostalgic fusion of creamy vanilla and bright, zesty orange, all swirled into a luscious bite? These aren’t your average chocolates. What makes these White Chocolate Orange Creamsicle Truffles truly special is the perfect balance of sweetness from the creamy white chocolate and the tangy, invigorating burst of fresh orange. They’re like sunshine captured in a truffle, a perfect treat to brighten any day. Imagin extracte the silky smooth texture melting in your mouth, followed by that unmistakable Creamsicle flavor. Whether you’re looking for a delightful homemade gift or a personal indulgence, these truffles are guaranteed to bring a smile and a whisper of pure, unadulterated joy.
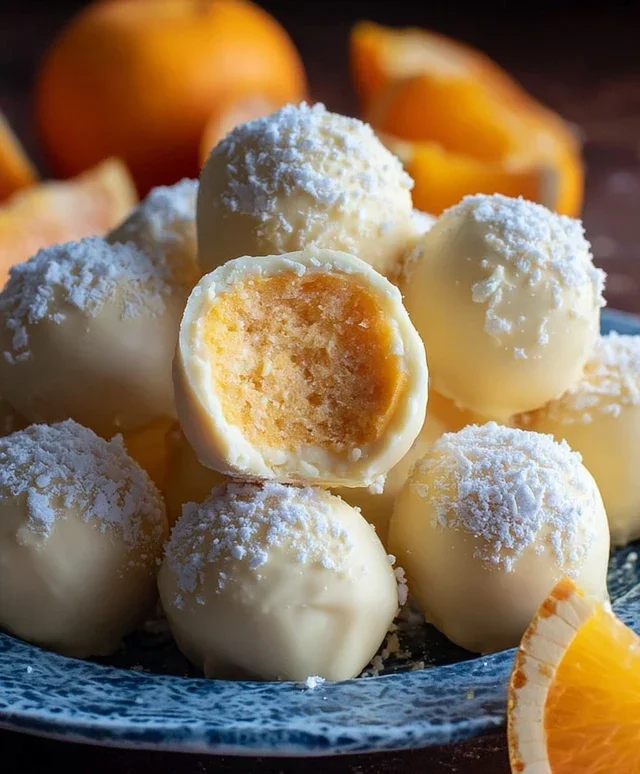
White Chocolate Orange Creamsicle Truffles
These White Chocolate Orange Creamsicle Truffles are like bottled sunshine and sweet nostalgia! Imagin extracte the classic, refreshing flavor of a Creamsicle – that delightful swirl of creamy vanilla and tangy orange – transformed into a decadent, melt-in-your-mouth truffle. They’re surprisingly simple to make, perfect for a special treat, a homemade gift, or just because you deserve something wonderfully delicious. The creamy white chocolate base perfectly complements the bright citrus notes, creating a flavor profile that’s both comforting and invigorating. Plus, with the optional food coloring, you can make them look as vibrant as they taste! Let’s get started on creating these little bites of happiness.
Ingredients:
Crafting Your Creamsicle Magic
The journey to these delightful truffles begin extracts with creating the base, a luscious white chocolate ganache infused with that unmistakable orange essence. This part is all about melting and emulsifying, bringin extractg together rich ingredients to form a smooth, decadent foundation.
Step 1: Melting the Foundation
Start by preparing your white chocolate. It’s crucial to chop the white chocolate into small, uniform pieces. This ensures that it melts evenly and quickly without scorching. Place your chopped white chocolate into a heatproof bowl. In a small saucepan, gently heat the unsalted butter and heavy cream over medium-low heat. You want to warm this mixture until the butter has completely melted and the cream is just starting to simmer around the edges. Be careful not to boil it, as overheated cream can affect the texture of your ganache. Once heated, pour this warm cream and butter mixture directly over the chopped white chocolate. Let it sit undisturbed for about 5 minutes. This resting period allows the heat from the cream to gently melt the chocolate from the inside out, preventing any harsh cooking.
Step 2: Emulsifying for Smoothness
After the resting period, it’s time to bring everything together. Grab a whisk or a spatula and begin extract stirring the white chocolate and cream mixture. Start from the center of the bowl and gradually work your way outwards in small circles. Continue stirring gently and consistently until the white chocolate is completely melted and the mixture is smooth, glossy, and fully incorporated. You’re looking for a uniform texture with no streaks of unmelted chocolate. This process is called emulsification, where the fat from the chocolate and butter binds with the liquid from the cream to create a stable, luscious ganache. Don’t overmix, but ensure every bit of chocolate has melted and is part of the smooth sauce.
Step 3: Infusing the Creamsicle Flavor
Now comes the fun part: adding that signature Creamsicle flavor! To your smooth white chocolate ganache, add the pinch of salt. The salt is a secret weapon in confections; it doesn’t make things salty, but rather enhances and balances the sweetness, making the other flavors pop. Next, carefully measure in the 1 teaspoon of orange extract. Start with one teaspoon; you can always add a tiny bit more if you want a stronger orange punch, but it’s harder to take away! Stir this in until it’s fully combined with the ganache. If you’re opting for the colorful Creamsicle look, this is the stage to add your food coloring. Add just a drop or two of orange food coloring, or a combination of red and yellow to achieve that classic Creamsicle hue. Stir gently until the color is evenly distributed. Remember, food coloring is potent, so start with a small amount and add more gradually until you reach your desired vibrancy.
Chilling and Shaping Your Truffles
Once your ganache is flavored and colored, it needs to firm up so you can handle it. This chilling phase is essential for achieving the perfect truffle texture.
Step 4: The Chill Factor
Once your ganache is perfectly blended and flavored, cover the bowl with plastic wrap, making sure the plastic wrap is directly touching the surface of the ganache. This prevents a skin from forming as it chills. Place the bowl in the refrigerator for at least 2 to 3 hours, or until the mixture is firm enough to scoop and roll into balls. You want it to be solid but still pliable, not rock hard. If you’re short on time, you can pop it in the freezer for about 30-45 minutes, checking it frequently to ensure it doesn’t freeze solid. The texture you’re aiming for is similar to thick peanut butter or playdough – firm enough to hold its shape but soft enough to easily mold with your hands.
Step 5: Rolling the Little Gems
Once the ganache has chilled and firmed up, it’s time to get your hands a little sticky! Line a baking sheet with parchment paper. This will prevent your truffles from sticking and make for easy cleanup. Use a small cookie scoop or a tablespoon to portion out the chilled ganache. Roll each portion into a smooth, round ball between the palms of your hands. If the mixture becomes too soft to handle, don’t worry! Simply pop it back into the refrigerator for another 15-20 minutes to firm up again. This is a common occurrence, especially in warmer kitchens. Aim for uniform sizes so they bake (or rather, set) evenly. Place the rolled truffle balls onto the prepared baking sheet.
The Finishing Touches
The final step brings it all together, transforming your rolled ganache into beautiful, bite-sized confections ready to be enjoyed.
Step 6: The Powdered Sugar Coating
Now, for the final flourish that truly evokes the spirit of a Creamsicle! In a shallow bowl or plate, place your 1/3 cup of powdered sugar. Gently roll each chilled truffle ball in the powdered sugar until it’s lightly and evenly coated. The powdered sugar gives them a beautiful, matte finish and adds a subtle sweetness that complements the orange and white chocolate beautifully, mimicking the powdery exterior of a classic Creamsicle. You can also opt to dip them in melted white chocolate for a more decadent coating, but the powdered sugar version is wonderfully simple and captures the essence perfectly. Once coated, you can place them back on the parchment-lined baking sheet. Allow the truffles to sit at room temperature for about 15-20 minutes to allow the powdered sugar coating to set slightly. Then, they are ready to be enjoyed! Store any leftover truffles in an airtight container in the refrigerator for up to a week. Enjoy these delightful White Chocolate Orange Creamsicle Truffles – a little taste of sunshine!
Conclusion:
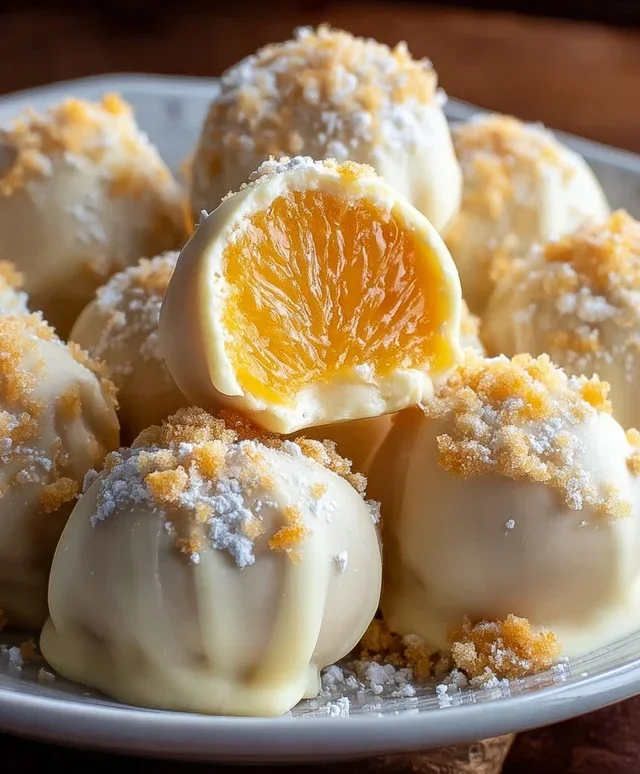
These White Chocolate Orange Creamsicle Truffles are an absolute dream come true for anyone who adores the nostalgic taste of a creamsicle! They perfectly capture that delightful creamy orange and vanilla essence in a bite-sized, melt-in-your-mouth truffle. The combination of smooth white chocolate, bright citrus, and creamy sweetness makes them incredibly moreish and impressive, yet surprisingly simple to whip up. They are the perfect treat for parties, holidays, or just as a delightful indulgence to brighten your day. I highly encourage you to give these White Chocolate Orange Creamsicle Truffles a try – you won’t regret it!
For serving, I love presenting them in little decorative cupcake liners. They also make for a wonderful addition to a dessert platter alongside other treats, or as a thoughtful homemade gift for friends and family. If you’re feeling adventurous with variations, consider adding a tiny pinch of cardamom for a subtle spice, or a swirl of orange zest into the white chocolate coating for an extra burst of flavor. You could even dip them partially in dark chocolate for a striking visual contrast and a more complex taste profile.
Frequently Asked Questions:
Can I use milk chocolate instead of white chocolate?
While the white chocolate is key to achieving that classic Creamsicle flavor, you absolutely can experiment with milk chocolate. It will change the overall taste profile, making it richer and less bright, but it can still be delicious! You might want to slightly reduce the orange extract to balance the stronger chocolate flavor.
How should I store these White Chocolate Orange Creamsicle Truffles?
The best way to store these delightful truffles is in an airtight container in the refrigerator. This will help them maintain their shape and prevent the chocolate from blooming. They should stay fresh for about 1-2 weeks. For a softer truffle, let them sit at room temperature for about 10-15 minutes before serving.
White Chocolate Orange Creamsicle Truffles
Indulge in these delightful no-bake truffles, perfectly capturing the nostalgic flavor of Creamsicles with a creamy white chocolate and vibrant orange fusion.
Ingredients
-
8 oz. white chocolate, chopped into small pieces
-
5 tablespoons unsalted butter
-
3 tablespoons heavy cream
-
Pinch of salt
-
1 teaspoon orange extract
-
1/3 cup powdered sugar
Instructions
-
Step 1
Melt the white chocolate and unsalted butter together in a heatproof bowl set over a saucepan of simmering water (double boiler), stirring until smooth. -
Step 2
Remove from heat and stir in the heavy cream, salt, and orange extract until fully combined. -
Step 3
If using, add a drop or two of orange (or red and yellow) food coloring and swirl gently to create a marbled effect. Do not overmix. -
Step 4
Cover the bowl and refrigerate for at least 1-2 hours, or until the mixture is firm enough to roll. -
Step 5
Once firm, scoop out small portions and roll them into 1-inch balls. If the mixture becomes too soft, chill it again. -
Step 6
Roll the truffle balls in powdered sugar until evenly coated. Store in an airtight container in the refrigerator.
Important Information
Nutrition Facts (Per Serving)
It is important to consider this information as approximate and not to use it as definitive health advice.
Allergy Information
Please check ingredients for potential allergens and consult a health professional if in doubt.