Easy Homemade Fruit Leather Recipe- Sweet Treat
Homemade Fruit Leather Recipe: Get ready to unlock a world of vibrant flavors and nostalgic joy with this incredibly simple and utterly delicious homemade fruit leather recipe. Forget those store-bought versions packed with artificial ingredients and sky-high sugar content. We’re talking about pure, unadulterated fruit goodness, transformed into chewy, tangy, and sweet strips that are perfect for lunchboxes, snacks, or a guilt-free treat. There’s something undeniably special about fruit leather – it’s the perfect balance of sweet and tart, with a satisfying chew that keeps you coming back for more. Making your own fruit leather is not only incredibly rewarding, but it also allows you to customize flavors, ensuring you get exactly the taste you crave. Imagin extracte the possibilities: a vibrant strawberry-raspberry blend, a tropical mango-pineapple explosion, or a classic apple cinnamon delight. This homemade fruit leather recipe is your gateway to endless fruity adventures.
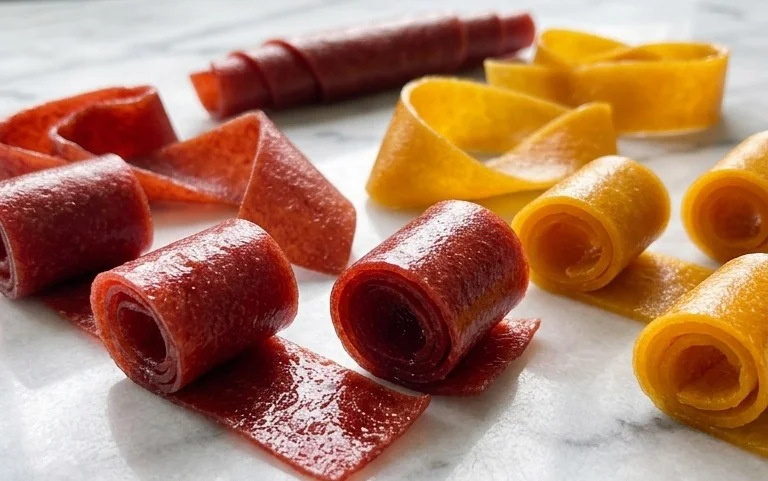
Homemade Fruit Leather Recipe
There’s something incredibly satisfying about creating your own snacks, and homemade fruit leather is one of the simplest and most rewarding treats you can make. It’s a fantastic way to use up ripe fruit, pack in some natural sweetness, and avoid the preservatives and added sugars often found in store-bought versions. Plus, it’s a hit with kids and adults alike! The process is surprisingly easy, requiring minimal hands-on time and just a few basic ingredients. Imagin extracte biting into a chewy, tangy strip bursting with pure fruit flavor – that’s the magic of homemade fruit leather. Let’s get started on creating this delightful treat!
Ingredients:
Preparing Your Fruit
The first step is to get your fruit ready. You can use almost any fruit you like, and a combination can create even more complex and delicious flavors. Berries like strawberries, raspberries, and blueberries are excellent choices. Stone fruits such as peaches, plums, and apricots lend a lovely tartness. Apples and pears are also great, though they tend to require a bit more cooking time to soften. For this recipe, I’ll assume you’re using something like mixed berries or chopped peaches. Make sure your fruit is ripe, as this will bring out its natural sweetness and reduce the need for added sugar. Wash your fruit thoroughly. If you’re using fruits like peaches or plums, you’ll want to remove the pits. For apples or pears, you can peel them if you prefer a smoother texture, though leaving the skin on adds extra fiber and nutrients. Chop the fruit into roughly uniform pieces so they cook down evenly. If using apples or pears, you might want to chop them a little smaller.
Blending the Base
Once your fruit is chopped, it’s time to create the fruit purée that will form the base of your leather. This is where your blender or food processor comes in. Add your chopped fruit to the blender. Don’t overcrowd it; you might need to do this in batches depending on the size of your blender. Now, add your white sugar. The amount of sugar can be adjusted. If your fruit is very sweet, you might want to start with less. If it’s a bit tart, you might need a touch more. The sugar not only adds sweetness but also acts as a preservative and helps create that classic chewy texture. Finally, squeeze in the juice of half a lemon. Lemon juice is crucial here. It brightens the fruit flavor, adds a lovely tang, and helps prevent the fruit from oxidizing (browning). Blend everything until you have a smooth purée. You want it to be as smooth as possible to ensure an even drying process later on. If you find it too thick to blend, you can add a tablespoon or two of water, but try to keep it as thick as possible to avoid adding too much moisture.
Cooking Down the Purée
After blending, the next step is to cook down the fruit purée. This is an important step to remove excess moisture and concentrate the flavors. You can do this in a saucepan on the stovetop or in a microwave-safe dish in the microwave.
Stovetop Method: Pour your fruit purée into a non-stick saucepan. Place it over medium heat. You’ll want to stir frequently to prevent sticking and burning. As it heats up, it will start to bubble and thicken. Continue to cook, stirring constantly, until the purée has thickened considerably. It should be the consistency of applesauce or a thick jam. This process can take anywhere from 10 to 20 minutes, depending on the fruit and the heat.
Microwave Method: Pour the purée into a large microwave-safe bowl. Microwave on high power for 3-minute intervals, stirring well after each interval. Continue this process until the purée has thickened significantly. This method can be quicker but requires careful monitoring to avoid splattering and burning.
The goal is to reduce the amount of water in the fruit, making it more concentrated and ensuring your fruit leather dries properly without becoming sticky or moldy.
Spreading and Preparing for Drying
Once your purée has reached the desired thickness, it’s time to prepare it for drying. Preheat your oven to its lowest setting, ideally between 170°F and 200°F (75°C to 95°C). You want a low, slow heat for dehydrating. Line a baking sheet with parchment paper or a silicone baking mat. Make sure the parchment paper or mat extends up the sides of the baking sheet slightly to catch any drips. Pour your cooked fruit purée onto the lined baking sheet. Use a spatula to spread it into a thin, even layer. Aim for a thickness of about ¼ inch (0.6 cm). The thinner you spread it, the faster it will dry. Try to get the layer as uniform as possible so that the entire sheet dries at the same rate. If you have any thicker spots, they might remain sticky while thinner spots become brittle.
The Drying Process
This is where the patience comes in. Place the baking sheet in your preheated oven. You’ll want to leave the oven door slightly ajar to allow moisture to escape. You can prop it open with a wooden spoon or a rolled-up piece of aluminum foil. The drying time will vary significantly depending on your oven temperature, the thickness of your fruit layer, and the type of fruit used. It can take anywhere from 4 to 8 hours, or even longer. Check on your fruit leather periodically. It’s ready when it is no longer sticky to the touch and peels easily from the parchment paper. It should be pliable but not wet. If you find certain areas are drying faster than others, you can carefully trim those edges to ensure evenness.
Cooling and Storing
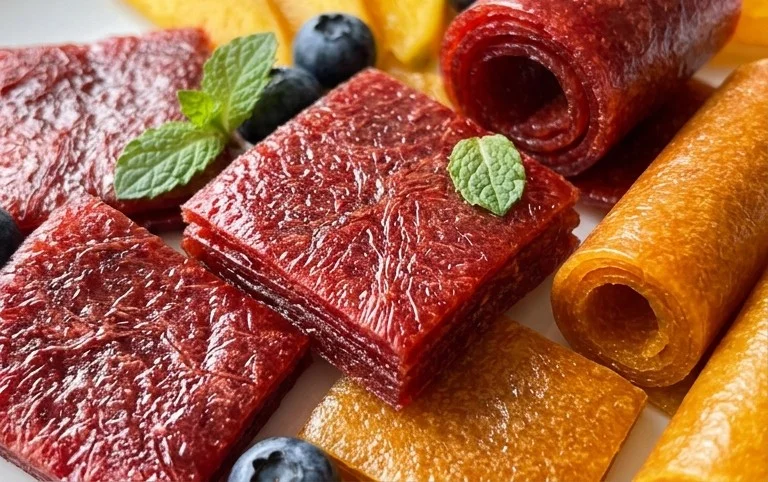
Once your fruit leather is fully dried and no longer sticky, carefully remove the baking sheet from the oven. Let the fruit leather cool completely on the baking sheet. This is important; if you try to roll or cut it while it’s still warm, it might stick to itself or be too soft. After it has cooled down, you can peel the entire sheet off the parchment paper. Now you can cut it into strips or shapes using a pizza cutter or kitchen scissors. For storage, roll up the strips tightly in parchment paper or plastic wrap. You can store them in an airtight container at room temperature for a week or two. For longer storage, you can keep them in the refrigerator or even freeze them. Homemade fruit leather is a wonderfully healthy and delicious snack that’s perfect for lunchboxes, after-school treats, or just a simple, guilt-free indulgence. Enjoy!
Conclusion:
Making your own fruit leather is an incredibly rewarding experience, offering a delicious and healthy snack that’s surprisingly simple to create. This homemade fruit leather recipe is a fantastic way to use up fresh or frozen fruit, reduce food waste, and control exactly what goes into your snacks – no added sugars or artificial ingredients necessary! The resulting chewy, intensely fruity strips are a delightful treat for kids and adults alike, perfect for lunchboxes, hiking trips, or just a guilt-free indulgence. We hope you’re feeling inspired to give this wonderful recipe a try!
Beyond the basic recipe, the possibilities for customization are endless. Feel free to experiment with different fruit combinations – think mango-raspberry, peach-blueberry, or even a tropical pineapple-passionfruit blend! For a touch of warmth, add a pinch of cinnamon or gin extractger. Serving suggestions are abundant: enjoy it on its own, cut into fun shapes for kids, or even crum extractble it over yogurt or ice cream. Don’t hesitate to get creative and make this fruit leather recipe your own!
Frequently Asked Questions about Homemade Fruit Leather:
Q: How long does homemade fruit leather typically last?
A: Properly stored, your homemade fruit leather can last for about 1 to 2 weeks at room temperature, or up to a month or even longer if refrigerated. Ensure it’s wrapped tightly in plastic wrap or stored in an airtight container to prevent it from drying out or becoming sticky.
Q: Can I make fruit leather without a dehydrator?
A: Absolutely! While a dehydrator offers the most consistent results, you can achieve delicious fruit leather using your oven. Simply set your oven to its lowest temperature (usually around 140-170°F or 60-75°C) and bake with the oven door slightly ajar to allow moisture to escape. Baking time will vary depending on your oven and fruit consistency, so keep a close eye on it.
Homemade Fruit Leather
A simple and delicious recipe for homemade fruit leather, perfect for snacks.
Ingredients
-
2 cups fruit, chopped
-
3 tbsp white sugar
-
½ whole lemon, just the juice
-
1 cup water
-
¼ tsp ground cinnamon
-
Pinch of salt
Instructions
-
Step 1
Prepare your fruit: Wash, chop, and remove any seeds or cores from your chosen fruit. -
Step 2
Cook the fruit: Combine chopped fruit, water, lemon juice, cinnamon, and salt in a saucepan. Bring to a simmer over medium heat and cook until the fruit is very soft. -
Step 3
Blend until smooth: Transfer the cooked fruit mixture to a blender or food processor and blend until completely smooth. Add white sugar and blend again to combine. -
Step 4
Prepare for baking: Preheat oven to 200°F (95°C). Line a baking sheet with parchment paper or a silicone baking mat. -
Step 5
Spread the mixture: Pour the fruit puree onto the prepared baking sheet and spread it into a thin, even layer (about ⅛ to ¼ inch thick). -
Step 6
Bake until dry: Bake for 2-4 hours, or until the fruit leather is no longer sticky to the touch and peels away easily from the parchment paper. Cooking time will vary depending on thickness and oven. -
Step 7
Cool and cut: Let the fruit leather cool completely on the baking sheet. Once cool, carefully peel it off the parchment and cut it into strips or shapes.
Important Information
Nutrition Facts (Per Serving)
It is important to consider this information as approximate and not to use it as definitive health advice.
Allergy Information
Please check ingredients for potential allergens and consult a health professional if in doubt.