Decadent Triple Chocolate Scones- Richly Delicious Treat
Triple Chocolate Scones are not just a treat; they are an experience. If you’re looking to elevate your brunch game or simply indulge in a moment of pure, unadulterated bliss, then these triple chocolate scones are precisely what you need. We all have those cravings, those moments where only something rich, decadent, and utterly satisfying will do, and for me, that’s where these beauties shine. What makes them so irresistible? It’s the symphony of chocolate textures and flavors – a deep cocoa base, studded with both semi-sweet and dark chocolate chips, all coming together in a tender, buttery crum extractb. Forget dry, crum extractbly disappointments; these triple chocolate scones are designed to be moist, tender, and bursting with chocolatey goodness in every single bite. They’re the perfect accompaniment to a steaming mug of coffee or a refreshing glass of milk, offering a delightful contrast of warm, comforting flavors. Get ready to fall head over heels for this incredible recipe.
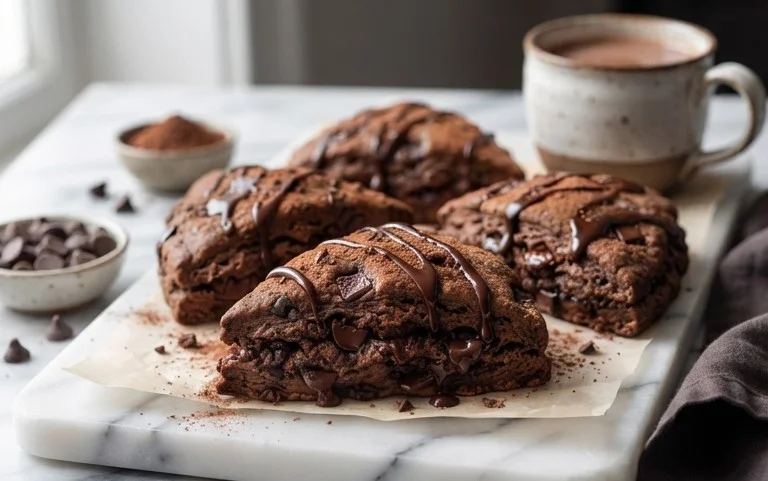
Triple Chocolate Scones
There are few things more satisfying than a warm, freshly baked scone, and when you add a triple dose of chocolate to the equation, you’ve got a truly irresistible treat. These Triple Chocolate Scones are rich, decadent, and surprisingly easy to make. They’re perfect for a weekend brunch, a special afternoon tea, or just when you need a serious chocolate fix. The combination of cocoa powder in the dough, chocolate chips folded in, and a luscious chocolate glaze makes every bite an adventure in chocolatey goodness. Don’t be intimidated by the chocolate; we’ll guide you through each step to ensure perfect results.
Ingredients:
Making the Scone Dough
The foundation of a great scone is a flaky, tender crum extractb. We achieve this by starting with cold, cubed butter and incorporating it into the dry ingredients. This process creates small pieces of butter that, when baked, melt and create steam, resulting in those signature flaky layers.
1. Combine Dry Ingredients: In a large mixing bowl, whisk together the all-purpose flour, unsweetened cocoa powder, granulated sugar, baking powder, ground cinnamon, and salt. Whisking thoroughly ensures that the leavening agent (baking powder) and flavorings are evenly distributed throughout the dough. This is a crucial first step for consistent results. Make sure your flour is spooned and leveled into the measuring cup to avoid using too much, which can lead to tough scones.
2. Cut in the Butter: Add the frozen, cubed unsalted butter to the dry ingredients. Use a pastry blender, two forks, or your fingertips to cut the butter into the flour mixture until it resembles coarse crum extractbs with some pea-sized pieces of butter still visible. It’s important that the butter remains cold throughout this process. If your hands are warm, the butter will start to melt, which will prevent the scones from becoming as flaky. The visible pieces of butter are essential for creating those pockets of steam during baking.
3. Add Wet Ingredients: In a separate, smaller bowl, whisk together the cold heavy cream, the cold large egg, and 1 and 1/2 teaspoons of pure vanilla extract. This mixture provides the necessary moisture to bring the dough together. Pour this wet mixture into the dry ingredients and gently mix with a spatula or wooden spoon until just combined. Be careful not to overmix! Overmixing develops the gluten in the flour, leading to tough scones. You want a shaggy dough that is still a little crum extractbly.
4. Fold in the Chocolate: Gently fold in the 6 ounces of coarsely chopped semi-sweet chocolate into the scone dough. Again, be careful not to overmix. You just want the chocolate pieces to be distributed throughout the dough. These chocolate chunks will melt slightly during baking, creating pools of gooey chocolate within the scone.
Shaping and Baking the Scones
Now that we have our delicious, chocolate-studded dough, it’s time to shape and bake them to golden perfection.
5. Shape and Bake: Turn the dough out onto a lightly floured surface. Gently bring the dough together with your hands, but do not knead it. Pat the dough into a round disc, about 3/4-inch thick. You can either cut this disc into 8 wedges using a sharp knife or pizza cutter, or you can use a round cookie cutter. Place the shaped scones onto a baking sheet lined with parchment paper, leaving a little space between them. Bake in a preheated oven at 400°F (200°C) for 16-20 minutes, or until the scones are firm to the touch and the tops are begin extractning to crack. For an extra rich flavor and appearance, you can brush the tops with a little extra cream before baking.
Crafting the Chocolate Glaze
No triple chocolate treat is complete without a decadent chocolate glaze. This simple glaze adds a final layer of irresistible chocolate flavor and a beautiful shine to your scones.
Making the Glaze
1. Prepare the Glaze: While the scones are baking or cooling, prepare the chocolate glaze. In a medium bowl, combine the confectioners’ sugar, 1 teaspoon of pure vanilla extract, and 2 tablespoons of water (or black coffee for an extra depth of flavor). Whisk until the mixture is smooth and lump-free. If the glaze is too thick, add a tiny bit more water or coffee, a teaspoon at a time, until you reach your desired drizzling consistency. If it’s too thin, add a little more confectioners’ sugar.
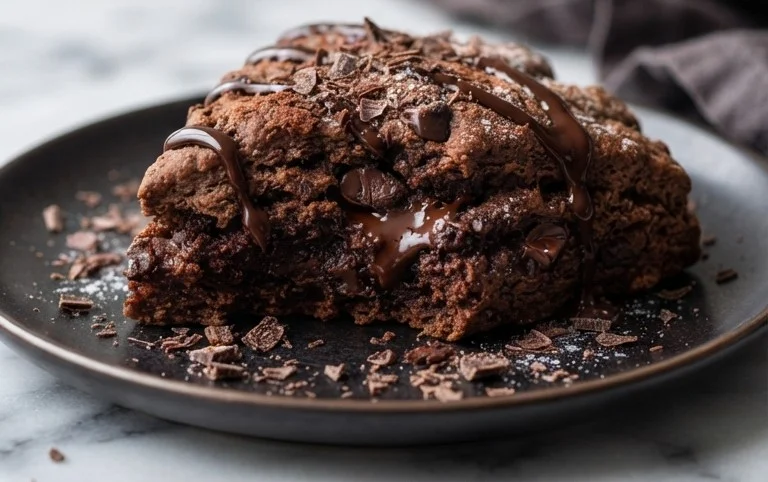
2. Glaze the Scones: Once the scones have cooled slightly on a wire rack (they should still be warm), liberally drizzle or spread the chocolate glaze over the tops. The warmth of the scones will help the glaze set slightly. For an even more intense chocolate experience, you can sprinkle the still-wet glaze with the remaining 4-ounce bar of coarsely chopped semi-sweet chocolate. Allow the glaze to set before serving.
Enjoy your homemade Triple Chocolate Scones! They are best served warm, perhaps with a cup of coffee or tea, and are sure to be a hit with any chocolate lover.
Conclusion:
I hope you’ve enjoyed learning how to make these absolutely divine Triple Chocolate Scones! This recipe truly delivers on its promise of rich, decadent chocolate flavor in every bite. The combination of dark, milk, and white chocolate, along with the tender, crum extractbly texture of a perfectly baked scone, makes this a treat that’s hard to resist. They are surprisingly straightforward to whip up, making them an excellent choice for a weekend baking project or even a special breakfast treat.
Serve these warm, perhaps with a dollop of clotted cream or a drizzle of extra chocolate ganache for ultimate indulgence. They also pair beautifully with a strong cup of coffee or a steaming mug of hot chocolate. If you’re feeling adventurous, try adding a handful of chopped nuts like pecans or walnuts for an extra layer of texture and flavor, or perhaps a swirl of raspberry jam for a sweet and tart contrast.
I truly encourage you to give these Triple Chocolate Scones a try. They are sure to become a new favorite in your baking repertoire. Experiment with the suggested variations and discover your perfect chocolatey creation!
Frequently Asked Questions:
Why are my scones dry?
Dry scones often result from overmixing the dough, which develops the gluten too much, or from using too much flour. Be careful not to overwork the dough; mix just until the ingredients are combined. You can also try adding a little extra liquid, like a splash of milk or cream, if the dough seems too dry.
Can I make these scones ahead of time?
Yes, you can! You can prepare the dough up to the point of shaping them and then wrap them tightly in plastic wrap and refrigerate for up to 24 hours. When you’re ready to bake, place them on the baking sheet and bake as directed, adding a few extra minutes to the baking time if necessary. They are best enjoyed the day they are baked for optimal freshness.
Triple Chocolate Scones
Indulge in these decadent triple chocolate scones, featuring a rich cocoa base, melty chocolate chunks, and a sweet chocolate glaze. Perfect for a special breakfast or dessert.
Ingredients
-
1 and 2/3 cups (209g) all-purpose flour (spooned & leveled)
-
1/3 cup (27g) unsweetened natural or Dutch-process cocoa powder
-
1/2 cup (100g) granulated sugar
-
2 and 1/2 teaspoons baking powder
-
1/2 teaspoon ground cinnamon
-
1/2 teaspoon salt
-
1/2 cup (8 Tbsp; 113g) unsalted butter, frozen
-
1/2 cup + 1 Tablespoon (135g/ml) heavy cream, cold
-
1 large egg, cold
-
1 and 1/2 teaspoons pure vanilla extract
-
6 ounces (170g) semi-sweet chocolate, coarsely chopped
-
1 cup (120g) confectioners’ sugar
-
1 teaspoon pure vanilla extract
-
2 Tablespoons (30g/ml) water
-
one 4-ounce (113g) bar semi-sweet chocolate, coarsely chopped
Instructions
-
Step 1
Preheat oven to 400°F (200°C). Line a baking sheet with parchment paper. -
Step 2
In a large bowl, whisk together the flour, cocoa powder, granulated sugar, baking powder, cinnamon, and salt. -
Step 3
Cut the frozen butter into small cubes and add to the dry ingredients. Use a pastry blender or your fingertips to cut the butter into the flour mixture until it resembles coarse crumbs. -
Step 4
In a separate small bowl, whisk together the heavy cream, egg, and 1 and 1/2 teaspoons of vanilla extract. Pour the wet ingredients into the dry ingredients and mix until just combined. Gently fold in the 6 ounces of chopped semi-sweet chocolate. -
Step 5
Turn the dough out onto a lightly floured surface and gently pat it into a 3/4-inch thick round. Cut the round into 8 wedges. -
Step 6
Place the wedges onto the prepared baking sheet. Bake for 15-18 minutes, or until a toothpick inserted into the center comes out with moist crumbs. -
Step 7
While the scones are baking, prepare the glaze. In a small bowl, whisk together the confectioners’ sugar, 1 teaspoon of vanilla extract, and water (or coffee) until smooth. Stir in the remaining 4-ounce bar of chopped semi-sweet chocolate until melted and incorporated. -
Step 8
Let the scones cool on the baking sheet for a few minutes before transferring them to a wire rack. Drizzle the chocolate glaze over the warm scones.
Important Information
Nutrition Facts (Per Serving)
It is important to consider this information as approximate and not to use it as definitive health advice.
Allergy Information
Please check ingredients for potential allergens and consult a health professional if in doubt.