Dairy-Free Pesto Recipe – Vibrant & Delicious
Dairy Free Pesto is a vibrant and herbaceous sauce that transcends dietary restrictions without sacrificing an ounce of flavor. For years, I’ve been searching for a way to capture that authentic pesto zest, that bright, nutty, garlicky goodness, while keeping it entirely dairy-free. And let me tell you, this recipe delivers! Traditional pesto, with its rich Parmesan cheese, is undeniably delicious, but it often leaves those avoiding dairy feeling left out. This dairy free pesto is here to change that narrative. It’s incredibly versatile, perfect for tossing with pasta, spreading on sandwiches, drizzling over roasted vegetables, or even as a dip. What makes this version so special is the careful balance of ingredients that creates a creamy texture and a depth of flavor that will fool even the most discerning palate. Get ready to fall in love with this guilt-free, flavor-packed creation.
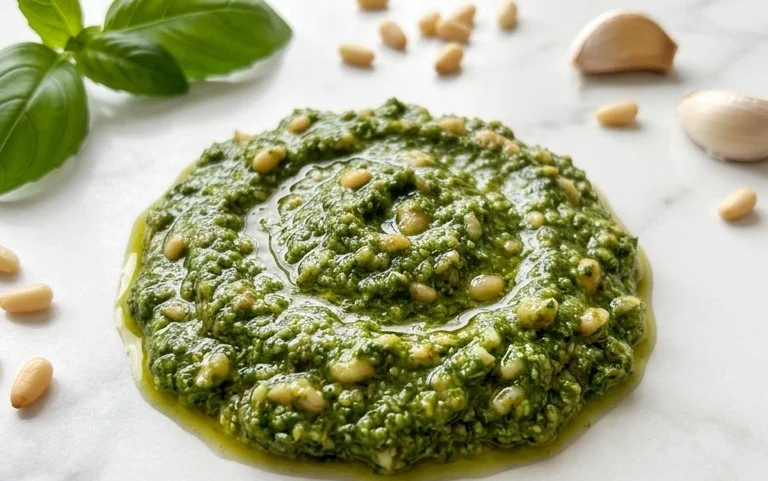
Dairy Free Pesto
Pesto. The very word conjures up images of vibrant green pasta sauces, the fresh aroma of basil, and a rich, nutty flavor. Traditionally, pesto relies on Parmesan cheese for its savory depth. But what if you’re dairy-free, or simply want to explore a delicious alternative? Fear not! This dairy-free pesto recipe is every bit as flavorful and satisfying as its classic counterpart, and it’s incredibly easy to make. Whether you’re a seasoned chef or just starting out in the kitchen, you’ll find this recipe a breeze, and the results will impress everyone, dairy-free or not.
This pesto is wonderfully versatile. It’s fantastic tossed with your favorite pasta (gluten-free options work beautifully too!), spread on crusty bread, dolloped onto roasted vegetables, or even used as a marinade for chicken or fish. The beauty of making your own pesto is the ability to control the ingredients and customize it to your liking. We’ll be using a fantastic combination of fresh basil, zesty lemon, toasty pine nuts, pungent garlic, and a secret weapon for that cheesy umami – nutritional yeast. Let’s get started on creating this flavor powerhouse!
Ingredients:
Crafting Your Dairy-Free Pesto
The process of making pesto is wonderfully simple, primarily involving a food processor or a mortar and pestle if you’re feeling traditional and want a bit of a workout! For most home cooks, a food processor will be your best friend here, delivering a smooth and consistent pesto in a matter of minutes.
Step 1: Preparing the Nuts
Before we combine everything, let’s give those pine nuts a little love. To enhance their flavor and make them easier to blend, I like to lightly toast them. You can do this in a dry skillet over medium-low heat for about 3-5 minutes, stirring constantly, until they’re fragrant and lightly golden brown. Watch them closely, as they can burn very quickly! Alternatively, you can spread them on a baking sheet and toast them in a preheated oven at 350°F (175°C) for about 5-7 minutes. Once toasted, let them cool completely. If you’re using walnuts or pumpkin seeds, the toasting process is the same, and they will also add a wonderful depth of flavor to your pesto. Don’t skip this step; it really elevates the nuttiness.
Step 2: Blending the Solids
Now, let’s get our food processor ready. Add the toasted and cooled pine nuts (or your chosen alternative) to the bowl. Next, add the peeled garlic cloves. You can give them a rough chop if they’re very large. Now, add the packed basil leaves. It might seem like a lot of basil, but it will break down beautifully. Pulse the food processor a few times to break down the nuts and garlic. You want a coarse mixture at this stage.
Step 3: Introducing the Liquids and Flavor Enhancers
With the solid ingredients roughly chopped, it’s time to add the rest of the components. Squeeze the juice from half a lemon directly into the food processor. This adds a bright, fresh acidity that cuts through the richness of the nuts and oil, and it also helps to preserve the vibrant green color of the basil. Next, add the salt. Start with the recommended 1/2 teaspoon, and you can always add more later if you feel it needs it. Finally, if you’re using it, add the nutritional yeast. This is the magic ingredient that provides a cheesy, umami flavor without any dairy. It’s a pantry staple for many plant-based cooks for good reason! Pulse everything a few more times to combine.
Step 4: Emulsifying with Olive Oil
Now for the crucial step of creating that luscious pesto texture. With the food processor running on low speed, slowly drizzle in the extra virgin extract olive oil through the feed tube. This process is called emulsification, where the oil is gradually incorporated into the other ingredients, creating a smooth, creamy, and cohesive sauce. Continue to stream in the olive oil until you reach your desired consistency. Some people prefer a chunkier pesto, while others like it very smooth. Adjust the amount of olive oil to achieve your perfect texture. If it seems too thick, you can always add a tiny bit more oil or even a teaspoon of water. If it’s too thin, don’t worry, it will thicken slightly as it chills.
Step 5: Tasting and Adjusting
Once the pesto is blended to your liking, turn off the food processor and taste it. This is where you become the chef! Does it need more salt? A little more lemon juice for brightness? Perhaps a touch more nutritional yeast for cheesiness? Don’t be afraid to experiment. The beauty of homemade pesto is that it’s fully customizable. You can also adjust the garlic level; if you’re a big garlic fan, feel free to add another clove. If you prefer a milder garlic flavor, you can even roast the garlic cloves before adding them for a sweeter, less pungent taste.
Storing Your Delicious Dairy-Free Pesto
Once your dairy-free pesto is perfect, transfer it to an airtight container. For optimal freshness, pour a thin layer of olive oil over the top of the pesto. This acts as a barrier, preventing oxidation and keeping your pesto vibrant green. You can store it in the refrigerator for up to a week. For longer storage, pesto freezes beautifully! Spoon it into ice cube trays, freeze until solid, then transfer the pesto cubes to a freezer-safe bag. This way, you can pop out just what you need for a quick and flavorful addition to any meal.
Enjoy your homemade dairy-free pesto! It’s a testament to how delicious and satisfying plant-based cooking can be, proving that you don’t need dairy to achieve incredible flavor.
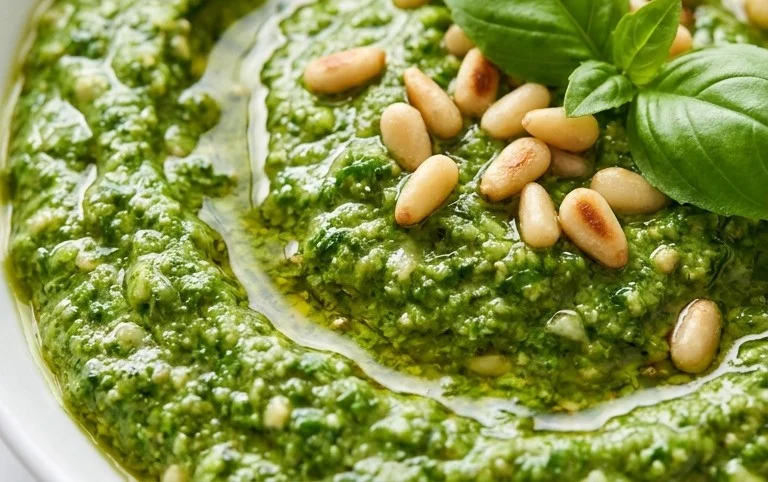
Conclusion:
I hope you’ve enjoyed learning how to make this delicious dairy-free pesto! It’s truly a game-changer for anyone looking to enjoy classic pesto flavor without the dairy. This recipe is fantastic because it’s incredibly versatile, bursting with fresh herbaceous notes, and surprisingly easy to whip up. It’s perfect for those with lactose intolerance, dairy allergies, or anyone simply wanting to explore plant-based alternatives. Don’t be afraid to experiment – this dairy-free pesto is ready to elevate all your favorite dishes!
Serving suggestions abound! This vibrant condiment is brilliant tossed with pasta (gluten-free, of course!), spread on sandwiches and wraps, dolloped onto roasted vegetables, or even as a dip for crusty bread. The possibilities are endless, and the rich flavor will have you reaching for more.
Don’t hesitate to try this dairy-free pesto recipe for yourself. You’ll be amazed at how satisfying and flavorful it is. I encourage you to embrace the simplicity and enjoy the wonderful taste!
Frequently Asked Questions about Dairy Free Pesto:
Can I freeze this dairy-free pesto?
Absolutely! This dairy-free pesto freezes beautifully. You can portion it into ice cube trays for single servings, or store larger amounts in airtight containers. It’s a fantastic way to have this delicious condiment on hand whenever you need a flavor boost.
What nuts can I use if I have a nut allergy?
If you have a nut allergy, you have great options! Sunflower seeds are a popular and delicious substitute for pine nuts, offering a similar texture and a slightly nutty flavor. Pumpkin seeds are another excellent alternative.
How long does this dairy-free pesto last in the refrigerator?
Stored in an airtight container in the refrigerator, this dairy-free pesto should stay fresh for about 5-7 days. To maximize its lifespan, consider topping the surface with a thin layer of olive oil before sealing to prevent oxidation.
Dairy Free Pesto
A vibrant and flavorful dairy-free pesto recipe perfect for pasta, sandwiches, and more. This recipe uses nutritional yeast to mimic the cheesy flavor of traditional pesto without any dairy.
Ingredients
-
3 cups basil leaves, fresh
-
1/2 lemon, juiced
-
1/2 cup pine nuts, toasted (or walnuts, pumpkin seeds)
-
2 cloves garlic, minced
-
1/4 cup olive oil, extra virgin
-
1/2 tsp salt
-
2 tbsp nutritional yeast (optional)
Instructions
-
Step 1
Toast the pine nuts (or other chosen nuts/seeds) in a dry skillet over medium heat until fragrant and lightly golden. Let them cool. -
Step 2
In a food processor, combine the fresh basil leaves, juiced lemon, toasted nuts/seeds, minced garlic, salt, and nutritional yeast (if using). -
Step 3
Pulse the ingredients a few times until roughly chopped. -
Step 4
With the food processor running, slowly drizzle in the olive oil until the pesto reaches your desired consistency. -
Step 5
Taste and adjust seasoning if needed, adding more salt or lemon juice. -
Step 6
Transfer the dairy-free pesto to an airtight container and store in the refrigerator.
Important Information
Nutrition Facts (Per Serving)
It is important to consider this information as approximate and not to use it as definitive health advice.
Allergy Information
Please check ingredients for potential allergens and consult a health professional if in doubt.