Dark Chocolate Sea Salt Nut Bars-Easy Homemade Treat
Dark Chocolate and Sea Salt Nut Bars are my absolute go-to when I need a satisfying, no-bake treat that feels both indulgent and surprisingly wholesome. Have you ever craved something that hits that perfect sweet and salty spot? That’s exactly what these incredible Dark Chocolate and Sea Salt Nut Bars deliver. They’re a symphony of textures and flavors: the rich, slightly bitter dark chocolate melting into the satisfying crunch of toasted nuts, all punctuated by those delightful little crystals of sea salt that awaken every taste bud. What makes them truly special, beyond their phenomenal taste, is their sheer simplicity. You can whip up a batch in minutes with minimal fuss, making them ideal for a quick energy boost during a busy day, a sophisticated addition to your afternoon coffee break, or even a homemade gift that’s guaranteed to impress. Forget those mass-produced candy bars; these homemade delights are in a league of their own.
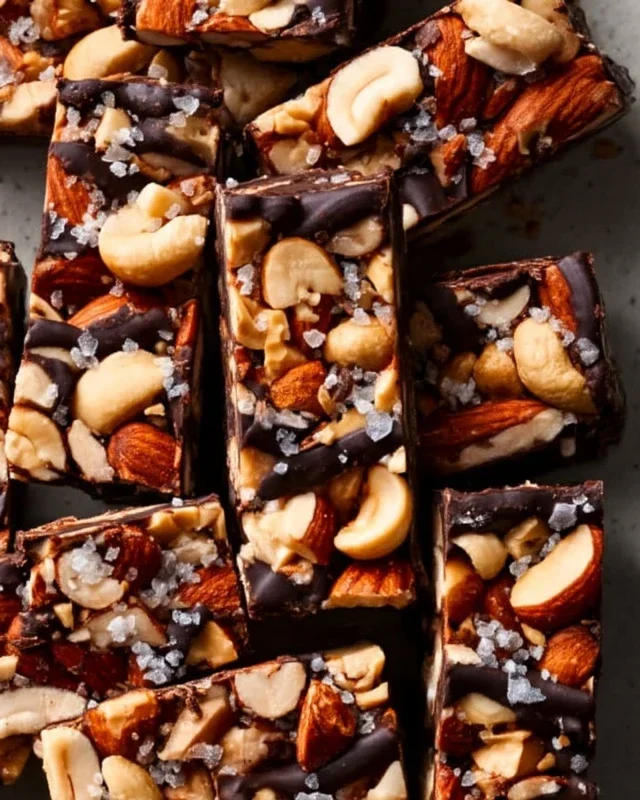
Dark Chocolate and Sea Salt Nut Bars
There’s something incredibly satisfying about a homemade snack, especially one that hits all the right notes: crunchy, chewy, a little sweet, and with that perfect hint of salt. These Dark Chocolate and Sea Salt Nut Bars are exactly that. They’re incredibly easy to whip up, making them perfect for a quick energy boost, a delightful afternoon treat, or even a thoughtful edible gift. The combination of rich dark chocolate and the subtle crunch of sea salt is truly irresistible, and the nutty base provides a wonderful texture and wholesome goodness. We’ve made sure this recipe is straightforward, so even if you’re new to making your own bars, you’ll find success.
Ingredients:
Crafting Your Delicious Nut Bars
The process of creating these bars is delightfully simple, involving just a few key stages: preparing the nutty base, binding everything together, and finishing with that decadent chocolate topping. Let’s get started!
Step 1: Preparing the Nutty Foundation
First, we need to get our nuts ready. If you’re using whole nuts, it’s a good idea to give them a rough chop. You don’t want them powdered, but rather in bite-sized pieces so you get a pleasant crunch in every bite. This also helps them bind together better. We find that a combination of nuts offers the most interesting texture and flavor profile. Cashews bring a creamy richness, peanuts a classic, satisfying nuttiness, and almonds add a delicate crunch. Feel free to experiment with your favorites – pecans, walnuts, or even pistachios would be wonderful additions. Once chopped, place your mixed nuts into a large mixing bowl. Next, add the puffed rice to the bowl with the nuts. The puffed rice is crucial for adding lightness and a delightful crispiness to the bars, preventing them from becoming too dense. Give the nuts and puffed rice a gentle stir to ensure they’re evenly distributed.
Step 2: Creating the Sweet Binder
Now, it’s time to bring everything together. In a small saucepan, gently heat the brown rice syrup over low heat. You want to warm it up just enough so it becomes more fluid and easier to mix. Be careful not to let it boil vigorously, as this can make the syrup too thick and difficult to work with. Once warm, remove the saucepan from the heat. Stir in the vanilla extract and the 1/2 teaspoon of sea salt. The vanilla adds a warm, aromatic depth, and the sea salt is essential for balancing the sweetness and enhancing all the other flavors. Whisk these together until well combined.
Step 3: Combining the Base Ingredients
Carefully pour the warm brown rice syrup mixture over the nuts and puffed rice in the large mixing bowl. Using a sturdy spatula or wooden spoon, begin extract to stir everything together. This is where a little patience and elbow grease come in handy. You want to coat all the nuts and puffed rice thoroughly with the syrup mixture. Ensure there are no dry pockets of nuts remaining. The mixture will start to clump together. Keep stirring until everything is evenly coated and you have a cohesive, sticky mass. This mixture will form the sturdy base of our bars.
Step 4: Pressing the Bars
Prepare an 8×8 inch baking dish by lining it with parchment paper. Leave a slight overhang on the sides of the dish; this will make it much easier to lift the entire slab of bars out once they’ve set. Now, transfer the nut and puffed rice mixture into the prepared baking dish. Using the back of your spatula or your hands (lightly dampened to prevent sticking), press the mixture down firmly and evenly into the dish. You really want to compact it well. This step is crucial for ensuring your bars hold their shape and don’t crum extractble when you cut them. The firmer you press, the more solid your bars will be. Aim for a surface that is as smooth and even as possible.
Step 5: The Decadent Chocolate Topping
In a microwave-safe bowl, combine the dark chocolate chips and the coconut oil. Microwave in 30-second intervals, stirring well after each interval, until the chocolate is almost completely melted. The coconut oil helps to create a smoother, glossier chocolate topping that sets beautifully. Stir the chocolate until it’s completely smooth and glossy. Alternatively, you can melt the chocolate and coconut oil in a double boiler. Once the chocolate is melted and smooth, carefully pour it over the pressed nut mixture in the baking dish. Use your spatula to spread the chocolate evenly over the entire surface, ensuring it reaches all the edges. If you’re using flaky sea salt for topping (which we highly recommend!), sprinkle it generously over the melted chocolate while it’s still wet. This adds that beautiful visual appeal and an extra burst of salty-sweet flavor.
Step 6: Chilling and Cutting
Once the chocolate topping is applied, place the baking dish in the refrigerator for at least 1-2 hours, or until the chocolate has set completely and the bars are firm. This chilling time is essential for allowing the flavors to meld and for the bars to firm up enough to be cut cleanly. Once firm, use the parchment paper overhang to lift the entire slab of bars out of the baking dish onto a cutting board. Using a sharp knife, carefully cut the slab into your desired bar shapes. We usually cut ours into about 12-16 bars. Store your finished Dark Chocolate and Sea Salt Nut Bars in an airtight container in the refrigerator for the best texture and flavor. Enjoy!
Conclusion:
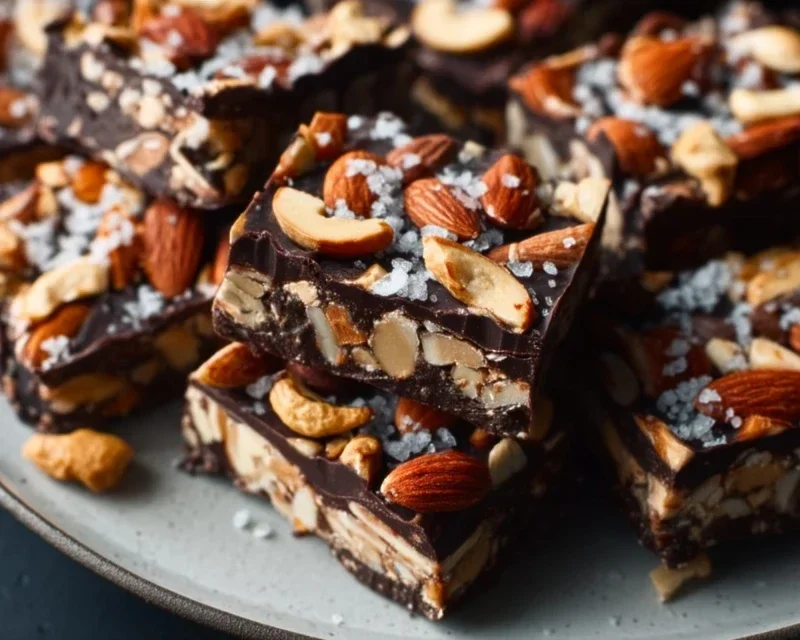
These Dark Chocolate and Sea Salt Nut Bars are an absolute triumph! They strike a perfect balance between rich, decadent dark chocolate and the satisfying crunch of toasted nuts, all elevated by that irresistible hint of flaky sea salt. They’re incredibly versatile, making them a fantastic go-to for a quick breakfast, a satisfying afternoon snack, or even a healthier dessert option. The simplicity of the recipe means you can whip them up with minimal fuss, and the results are consistently impressive. I truly encourage you to give these Dark Chocolate and Sea Salt Nut Bars a try – you won’t be disappointed!
For serving, I love enjoying them as is, perhaps with a cup of coffee or tea. They also make a wonderful addition to a cheese board, offering a sweet and salty counterpoint. If you’re feeling adventurous, consider adding a sprinkle of chili flakes to the topping for a touch of heat, or swapping out some of the nuts for seeds like pumpkin or sunflower for added texture and nutrition. The possibilities are truly endless!
Frequently Asked Questions:
Can I use milk chocolate instead of dark chocolate?
Absolutely! While dark chocolate provides a lovely depth and complements the saltiness so well, milk chocolate will also work. Just be aware that the overall sweetness will increase, and you might want to slightly reduce the amount of sweetener in the base if you prefer a less sweet bar.
How should I store these bars?
Store your Dark Chocolate and Sea Salt Nut Bars in an airtight container at room temperature for up to a week. If your kitchen is particularly warm, or you prefer them firmer, you can also store them in the refrigerator. They also freeze beautifully for longer storage!
What kind of nuts are best to use?
A blend of your favorite nuts works wonderfully! Almonds, walnuts, pecans, and cashews are all excellent choices. Toasting them lightly before incorporating them into the bars really brings out their flavor and adds an extra layer of deliciousness.
Dark Chocolate and Sea Salt Nut Bars
Chewy and satisfying nut bars featuring a blend of nuts, puffed rice, and dark chocolate, finished with a sprinkle of sea salt.
Ingredients
-
2 1/2 cups unsalted nuts of choice (3/4 cup cashews, 3/4 cup peanuts, 1 cup almonds)
-
1/2 cup puffed rice
-
1/4 cup brown rice syrup
-
1 1/2 teaspoon vanilla extract
-
1/2 teaspoon sea salt
-
1 cup dark chocolate chips
-
2 teaspoons coconut oil
-
flaky salt for topping (optional)
Instructions
-
Step 1
Line an 8×8 inch baking pan with parchment paper, leaving an overhang on the sides. -
Step 2
In a large bowl, combine the nuts and puffed rice. -
Step 3
In a small saucepan over medium heat, gently warm the brown rice syrup and vanilla extract until just combined. Do not boil. -
Step 4
Pour the warm syrup mixture over the nuts and puffed rice. Add the 1/2 teaspoon of sea salt and stir well to coat everything evenly. -
Step 5
Press the mixture firmly and evenly into the prepared baking pan. -
Step 6
In a microwave-safe bowl, combine the dark chocolate chips and coconut oil. Microwave in 30-second intervals, stirring in between, until melted and smooth. -
Step 7
Pour the melted chocolate over the nut mixture in the pan and spread evenly. If using, sprinkle flaky salt over the chocolate. -
Step 8
Refrigerate for at least 1 hour, or until the chocolate is set. Cut into bars.
Important Information
Nutrition Facts (Per Serving)
It is important to consider this information as approximate and not to use it as definitive health advice.
Allergy Information
Please check ingredients for potential allergens and consult a health professional if in doubt.