Easy Homemade Strawberry Ice Cream Recipe
Homemade strawberry ice cream is more than just a dessert; it’s a portal to pure, unadulterated joy. Imagin extracte the sun-drenched sweetness of ripe, juicy strawberries, transformed into a creamy, dreamy confection that melts in your mouth with every lick. This isn’t just any strawberry ice cream; this is the kind that transports you back to carefree summer days, to the simple pleasure of a perfectly ripe berry bursting with flavor. We all love ice cream, but there’s something profoundly satisfying about creating your own. The vibrant color, the intense fruitiness, and the smooth, velvety texture are all amplified when you know you’ve lovingly crafted it yourself. Forget artificial flavors and fillers; our homemade strawberry ice cream celebrates the natural goodness of fresh fruit, creating a truly special treat that’s far superior to anything you’ll find in a store. Get ready to experience strawberry perfection!
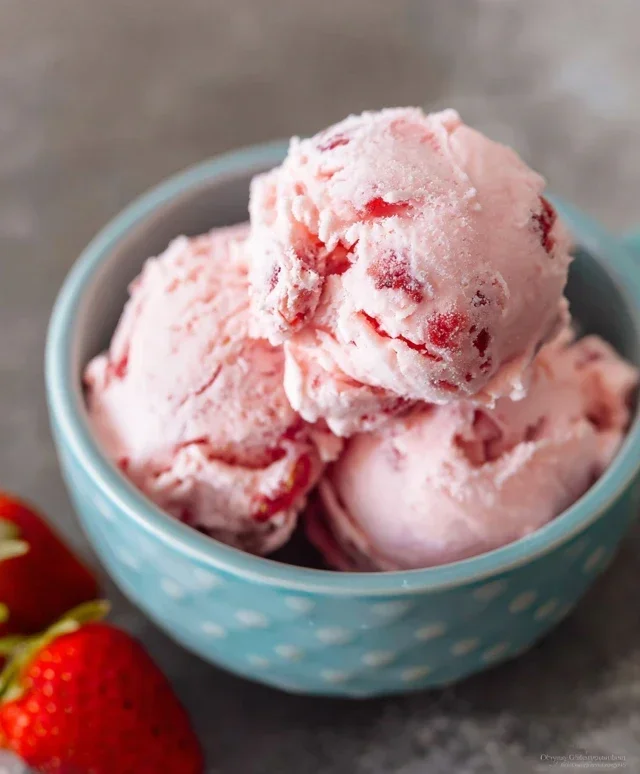
Homemade Strawberry Ice Cream
There’s something undeniably special about homemade ice cream. It’s creamier, more flavorful, and carries a sense of accomplishment that store-bought tubs simply can’t replicate. And when it comes to the queen of summer fruits, strawberries, the homemade version is a revelation. Forget artificial flavors and preservatives; this recipe celebrates the pure, vibrant taste of fresh strawberries, transformed into a luscious, frozen treat. This recipe is surprisingly simple, requiring no fancy equipment beyond a blender or food processor and, ideally, an ice cream maker. Even without one, I’ll share a method that works beautifully, though it requires a bit more patience. Get ready to impress yourself and anyone lucky enough to share a scoop (or two!) of this delightful homemade strawberry ice cream.
Ingredients:
Instructions:
Prepare the Strawberry Puree: The heart of our ice cream lies in a vibrant strawberry puree. In a blender or food processor, combine the hulled and diced strawberries, honey, granulated sugar, and lemon juice. The lemon juice is a secret weapon here; it doesn’t just add a subtle tang, but it also brightens the strawberry flavor, making it sing. Blend these ingredients until they are completely smooth and uniformly pureed. You want a luscious, seedless (or mostly seedless, depending on your preference and blender’s power) mixture that will form the base of our ice cream. For an extra smooth texture, you can strain the puree through a fine-mesh sieve to remove any lingering seeds, though I often find it unnecessary with good quality strawberries and a powerful blender. Taste this mixture – it should be intensely strawberry-forward with just the right amount of sweetness and a whisper of lemon. This is your chance to adjust sweetness if your strawberries are particularly tart or if you have a sweeter palate.
Chill the Base: Once your strawberry puree is ready, it’s time to incorporate the dairy. In a separate bowl, whisk together the heavy whipping cream, half and half, and vanilla extract. The vanilla is crucial for adding depth and complexity to the overall flavor profile, complementing the fruit without overpowering it. Now, gently fold the strawberry puree into this cream mixture. Stir until everything is well combined, but avoid overmixing, which can introduce too much air at this stage. The goal is a uniform, pnon-alcoholic ale pink, creamy base. Now comes a vital step: chilling. Cover the bowl tightly with plastic wrap and refrigerate it for at least 2 hours, or preferably overnight. This is crucial for a few reasons. Firstly, a very cold base churns more efficiently in an ice cream maker, resulting in a smoother, creamier texture. Secondly, chilling allows the flavors to meld and deepen, creating a more harmonious taste. This resting period is where the magic truly begin extracts to happen behind the scenes.
Churn the Ice Cream: If you have an ice cream maker, now is its time to shine. Make sure your ice cream maker’s bowl is thoroughly frozen according to the manufacturer’s instructions (this usually means at least 24 hours in the freezer). Pour the chilled strawberry base into your ice cream maker and churn according to the manufacturer’s directions. This typically takes about 20-30 minutes. You’ll know it’s ready when the mixture has thickened to a soft-serve consistency. The churning process incorporates air and breaks down ice crystals, which is what gives ice cream its signature creamy texture. Watch it closely; over-churning can lead to a grainy texture. If you don’t have an ice cream maker, don’t despair! Pour the chilled base into a shallow, freezer-safe container. Place it in the freezer. Every 30-45 minutes for the next 3-4 hours, remove the container and vigorously stir or whisk the mixture, breaking up any ice crystals that form. This manual churning is essential for achieving a creamy texture.
Harden the Ice Cream: Once your ice cream has reached that desirable soft-serve consistency (either from the ice cream maker or your manual efforts), it’s time for the final hardening phase. Transfer the ice cream to an airtight, freezer-safe container. For the best results, press a piece of parchment paper or plastic wrap directly onto the surface of the ice cream before sealing the container. This helps prevent ice crystals from forming on the top, which can affect the texture. Place the container in the freezer for at least 4-6 hours, or until it’s firm enough to scoop. This resting period allows the ice cream to fully set and firm up. Patience is key here; resist the urge to dig in too early! The reward for your wait will be a perfectly scoopable, lusciously frozen dessert.
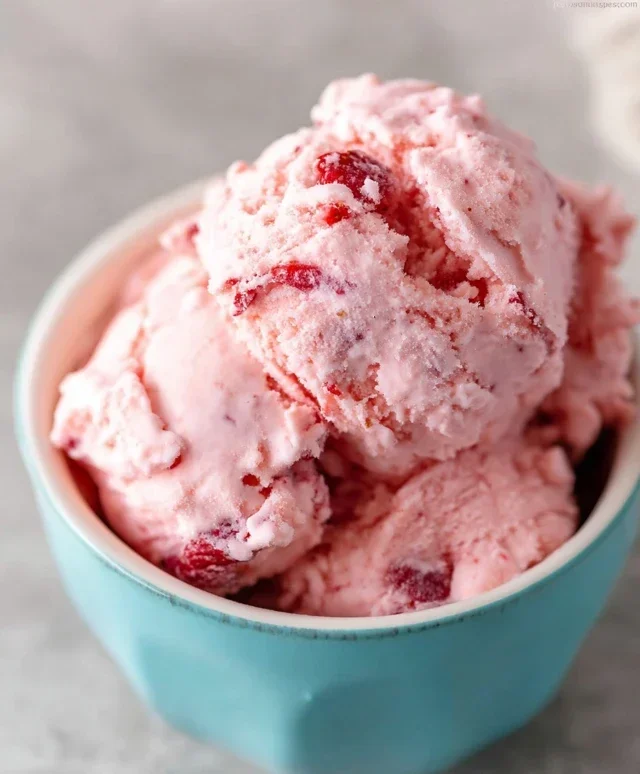
Serve and Enjoy: The moment of truth has arrived! Once your homemade strawberry ice cream has hardened to perfection, it’s ready to be served. Let it sit at room temperature for a few minutes before scooping to make it easier. Scoop generously into bowls or cones. Garnish with fresh strawberries, a sprig of mint, or a dollop of whipped cream if you’re feeling indulgent. The vibrant pink hue and the sweet, fresh strawberry flavor are best enjoyed immediately. This ice cream is wonderful on its own, but it also pairs beautifully with shortcake, brownies, or a slice of pound cake. The best part about making your own ice cream is the ability to customize it. If you want a more intense strawberry flavor, add a touch more puree. If you prefer a sweeter ice cream, a little extra sugar can be added to the initial puree. The possibilities are endless, and the satisfaction of creating such a delicious treat from scratch is truly unparalleled. Enjoy every creamy, fruity bite!
Conclusion:
Making homemade strawberry ice cream is a truly rewarding experience, and this recipe makes it delightfully simple. You’ve just discovered how easy it is to create a rich, creamy, and intensely fruity treat that far surpasses anything you can buy in a store. The natural sweetness and vibrant color of fresh strawberries shine through, creating a perfect balance of tart and sweet. Imagin extracte the delight of scooping into your own handcrafted dessert, knowing you used the freshest ingredients. This is not just ice cream; it’s a taste of summer captured in a bowl!
This delightful strawberry ice cream is incredibly versatile. Serve it on its own for a pure, unadulterated strawberry bliss. It’s also fantastic alongside a warm slice of homemade pound cake, a flaky apple pie, or even drizzled with a balsamic glaze for a sophisticated touch. For variations, consider adding a swirl of raspberry puree for a beautiful marbled effect, or fold in some finely chopped dark chocolate for a delightful contrast. Don’t be afraid to experiment and make this recipe your own! I truly encourage you to give this homemade strawberry ice cream a try – you won’t regret it!
Frequently Asked Questions:
Can I make this without an ice cream maker?
Absolutely! While an ice cream maker yields the smoothest texture, you can achieve delicious results without one. Instead of churning, you’ll need to periodically stir the ice cream mixture as it freezes in the freezer. This typically involves taking it out every 30-60 minutes and vigorously whisking it to break up ice crystals. It requires a bit more effort, but the homemade strawberry ice cream will still be wonderful.
How long does homemade strawberry ice cream last?
Stored properly in an airtight container in the freezer, your homemade strawberry ice cream should stay delicious for about 1 to 2 weeks. Beyond that, the texture might start to degrade, and freezer burn can become an issue. For the best flavor and consistency, enjoy it sooner rather than later!
What kind of strawberries are best for this recipe?
For the most vibrant flavor and color, ripe, in-season strawberries are ideal. Whether you use fresh or frozen (thawed and drained), look for berries that are deeply red and fragrant. If your fresh strawberries aren’t as sweet as you’d like, you might need to adjust the sugar slightly, but always taste your puree before adding it to the cream base.
Homemade Strawberry Ice Cream
A simple and delicious homemade strawberry ice cream recipe. No ice cream maker required!
Ingredients
-
1 1/2 cups strawberries, hulled and diced
-
2 Tbsp honey
-
1/2 cup granulated sugar
-
1 tsp lemon juice
-
1 cup heavy whipping cream
-
1/2 cup half and half
-
1 tsp vanilla extract
Instructions
-
Step 1
In a bowl, combine the diced strawberries, honey, granulated sugar, and lemon juice. Gently mash the strawberries with a fork, or pulse a few times in a food processor, to release their juices. Let this mixture sit for about 15-20 minutes to allow the flavors to meld. -
Step 2
In a separate bowl, whisk together the heavy whipping cream, half and half, and vanilla extract until well combined. -
Step 3
Add the strawberry mixture to the cream mixture and stir until evenly distributed. -
Step 4
Pour the mixture into a freezer-safe container, such as a loaf pan or a plastic container with a lid. Cover tightly. -
Step 5
Freeze for at least 4-6 hours, stirring every hour for the first 3-4 hours to break up ice crystals and ensure a creamy texture. The longer it freezes, the firmer it will become. -
Step 6
Before serving, let the ice cream sit at room temperature for about 5-10 minutes to soften slightly.
Important Information
Nutrition Facts (Per Serving)
It is important to consider this information as approximate and not to use it as definitive health advice.
Allergy Information
Please check ingredients for potential allergens and consult a health professional if in doubt.