Easy Pickled Red Onions- Quick & Vibrant Flavor
Pickled red onions are a culinary revelation, transforming the humble onion into a vibrant, tangy, and surprisingly versatile condiment. If you’ve ever wondered what gives your favorite tacos, avocado toast, or even simple salads that extra burst of flavor and beautiful pop of color, chances are it’s a generous sprinkle of these beauties. I absolutely adore pickled red onions because they cut through richness with their bright acidity and offer a delightful crunch that elevates any dish. What makes them so special is their ability to provide a sweet yet sour counterpoint that is simply irresistible. They’re not just a garnish; they are a flavor enhancer, a palate cleanser, and a visual masterpiece all rolled into one. Forget soggy, bland toppings; these pickled red onions are a game-changer for your kitchen repertoire.
Ingredients:
Crafting Perfect Pickled Red Onions: A Flavor Burst for Any Dish
There’s a certain magic that happens when you transform humble red onions into vibrant, tangy, and slightly sweet pickled gems. Pickled red onions are more than just a condiment; they’re a flavor enhancer, a color booster, and an absolute game-changer for everything from tacos and sandwiches to salads and charcuterie boards. The beauty of making them at home is twofold: you have complete control over the ingredients, ensuring a clean and delicious outcome, and the process itself is surprisingly simple and incredibly rewarding. Forget those store-bought versions that often lack a certain zing or have an overwhelming artificial sweetness. With just a few pantry staples and a little bit of time, you can create a batch of pickled red onions that will elevate your culinary creations to a whole new level.
The appeal of pickled red onions lies in their ability to cut through richness and add a bright, acidic counterpoint to a variety of dishes. Their beautiful magenta hue also adds an immediate visual pop, making your meals more appealing. Whether you’re looking to add a little something special to your weeknight dinner or impress guests at your next gathering, this recipe is your answer. It’s a versatile staple that will quickly become a favorite in your refrigerator. Let’s dive into how we can create this delightful condiment.
Preparing the Onions: The Foundation of Flavor
The first step in creating our delicious pickled red onions is all about preparing the star ingredient: the red onions. For this recipe, you’ll need two medium-sized red onions, or if you have smaller ones, three will do the trick. The key here is to aim for a consistent thickness when slicing. This ensures that each piece of onion pickles evenly, leading to a uniform texture and flavor throughout your jar.
To start, I like to peel the outer papery skin from the red onions. Then, I trim off the stem end, the one with the little root hairs. You can leave the root end intact for now, as it helps to hold the onion together while you slice it. Next, I cut the onion in half vertically, from the stem end to the root end. This makes it much easier to handle and slice.
Now comes the slicing. I prefer to slice the onions thinly, aiming for about 1/8-inch thick slices. You can achieve this with a sharp chef’s knife, a mandoline slicer (use caution if you opt for this, as they are very sharp!), or even a food processor with a slicing blade. If using a knife, hold the onion half flat on your cutting board and slice across the grain. The thinner you slice them, the quicker they will pickle and the more tender they will become. Once sliced, you can discard the root end. If your onion halves are quite large, you might find that some of the inner layers want to separate. That’s perfectly fine! Just ensure all the pieces are relatively uniform in thickness.
Crafting the Pickling Brine: The Heart of the Transformation
With our onions prepped and ready to go, it’s time to create the magical liquid that will transform them: the pickling brine. This simple mixture of liquids, sugar, and salt is where all the tangy, sweet, and savory flavor comes from.
In a medium saucepan, we’re going to combine the water and white vinegar. I like to use a good quality white vinegar, as it has a clean, bright acidity that’s perfect for pickling. For this recipe, you’ll need 1 1/4 cups of water and 1 1/4 cups of white vinegar. This equal ratio creates a balanced brine that’s not too harsh.
Next, we add the sweetener. For this recipe, we’ll use 3 tablespoons of sugar. The type of sugar you use can subtly influence the final flavor. Granulated white sugar is a reliable choice, but you could also experiment with cane sugar for a slightly richer sweetness, or even a touch of maple syrup for a more complex note (though this might alter the color slightly). The sugar is crucial for balancing the acidity of the vinegar and creating that addictive sweet-and-sour profile.
Finally, we add the sea salt. I always opt for sea salt over table salt because it has a cleaner, less metallic taste. We’ll add 1 tablespoon of sea salt to the brine. If you are using optional red pepper flakes for a hint of heat, now is the time to stir them into the brine. Add between 1/4 and 1/2 teaspoon, depending on your spice preference. A little goes a long way, and you can always add more next time if you’re feeling adventurous!
Heating and Combining: The Quickening Process
Now that all the ingredients for our brine are in the saucepan, it’s time to bring it all together. Place the saucepan over medium heat on your stovetop. We don’t need to boil the brine vigorously, but we do want to heat it until the sugar and salt are completely dissolved. Stir the mixture occasionally as it heats up, making sure everything is well incorporated. You’ll see the sugar crystals and salt grains disappear into the liquid, creating a clear and fragrant brine.
Once the sugar and salt have dissolved and the brine is hot (but not necessarily at a rolling boil), remove the saucepan from the heat. This is the critical moment where we combine the prepared onions with our flavorful brine.
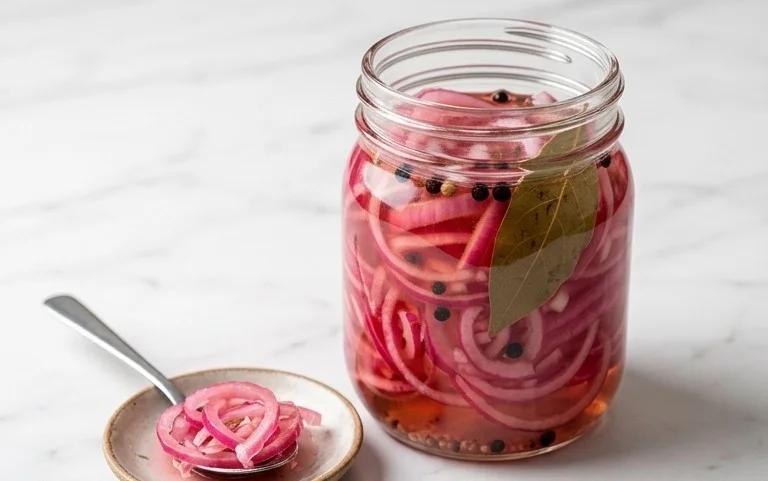
Grab a clean glass jar or container. A pint-sized jar is usually perfect for this amount of pickled onions. Make sure the jar is clean and has a lid. Carefully place your thinly sliced red onions into the jar. Don’t pack them in too tightly; you want them to be able to move around a bit and be fully submerged in the brine.
Now, very carefully, pour the hot pickling brine over the sliced onions in the jar. Use a ladle or a heatproof measuring cup for this step to avoid any spills. Ensure that the onions are completely covered by the brine. If any onions are sticking out above the liquid, you can gently push them down with a spoon or add a tiny bit more water and vinegar in equal parts to cover them fully. You might notice the color of the onions intensifying almost immediately as they begin extract to soak up the vibrant brine.
Cooling and Infusing: The Patience Game
This is where the magic truly sets in, and a bit of patience is required. Once the jar is filled with the hot brine and onions, secure the lid tightly. Let the jar sit on your countertop at room temperature for at least 30 minutes. During this time, the onions will continue to soften and absorb the flavors of the brine. You’ll also notice the brine itself starting to take on the beautiful pinkish-red hue of the onions.
After this initial resting period, transfer the jar to the refrigerator. This is where the pickling process really takes hold. The cold temperature slows down the enzymatic activity and allows the flavors to meld and deepen. For the best flavor, I recommend letting them pickle for at least 2 hours, but ideally, wait for at least 8 hours or even overnight. The longer they sit in the refrigerator, the more developed and delicious the flavor will become. You’ll find that the onions transform from sharp and pungent to tender, slightly crisp, and wonderfully tangy.
When you’re ready to use them, simply spoon them out of the jar. The brine itself is also incredibly flavorful and can be used in salad dressings, marinades, or even as a deglazing liquid for pan sauces.
Storage and Enjoyment: The Delicious Rewards
Once your pickled red onions have reached your desired level of tangin extractess and tenderness (usually after a few hours or overnight in the fridge), they are ready to be enjoyed! Store the senon-alcoholic aled jar in the refrigerator. They will keep well for at least 2-3 weeks, and often even longer. As they sit, the flavor will continue to develop, becoming even more complex and delicious. You’ll find that your batch of homemade pickled red onions will vanish surprisingly quickly.
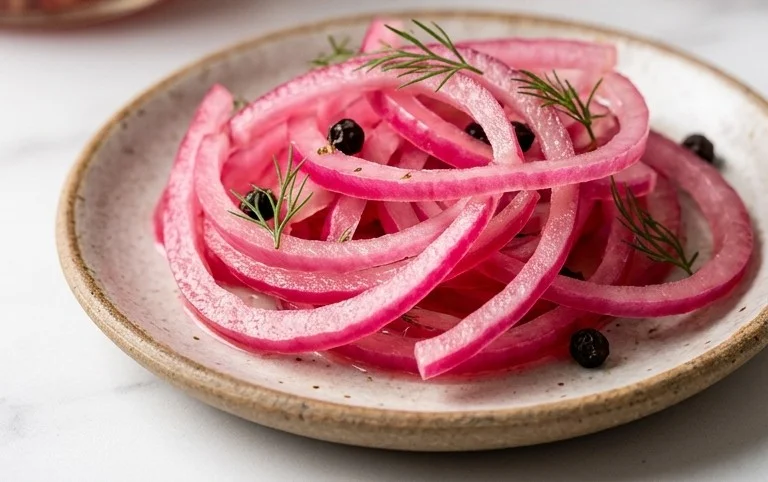
The versatility of these pickled red onions is truly astounding. They are an absolute dream atop avocado toast, adding a zesty kick to any brunch. Pile them high on your favorite tacos or burritos for an instant upgrade. They are a superb addition to burgers and sandwiches, providing a refreshing crunch and a tangy bite. Toss them into green salads for a vibrant burst of flavor, or add them to potato salad or coleslaw for a delightful twist. And for the charcuterie board aficionados, they are a must-have, offering a beautiful pop of color and a sophisticated tang that complements cheeses and cured meats perfectly. Enjoy the fruits of your simple labor – your homemade pickled red onions are ready to impress!
Conclusion:
There you have it! This pickled red onions recipe is a game-changer for elevating your everyday meals. It’s incredibly simple to make, requiring just a few pantry staples and minimal effort. The vibrant pink hue and zesty, slightly sweet tang of these pickled onions add an instant burst of flavor and visual appeal to almost anything. From adding a refreshing crunch to tacos and sandwiches to brightening up salads and avocado toast, the versatility is astounding. Don’t be afraid to experiment with serving them alongside grilled meats, roasted vegetables, or even as a garnish for cocktails!
Remember, this recipe is wonderfully adaptable. Feel free to adjust the sugar and vinegar ratios to your preference, or add a pinch of red pepper flakes for a subtle kick. I truly encourage you to give this pickled red onions recipe a try. It’s a small effort for a big reward, and you’ll find yourself reaching for them time and time again.
Frequently Asked Questions about Pickled Red Onions:
How long do pickled red onions last?
Stored in an airtight container in the refrigerator, your pickled red onions should stay fresh and delicious for at least 2-3 weeks. The longer they sit, the more the flavors meld and deepen, so don’t hesitate to let them sit for a few days before diving in.
Can I use a different kind of onion?
While red onions are ideal for their color and slightly milder flavor when pickled, you can certainly experiment with other onions. White or yellow onions will work, but they won’t achieve that signature vibrant pink hue. Shallots also make a fantastic, albeit more delicate, pickled option.
My pickled onions aren’t very crisp. What did I do wrong?
For the crispiest pickled red onions, ensure you’re using fresh, firm onions. Some people also find that rinsing the sliced onions under cold water before pickling can help remove some of the sharper bite and contribute to a better texture. Overcrowding the jar can also affect crispness, so give them some breathing room.
Pickled Red Onions
Quick and easy pickled red onions, perfect for adding a tangy crunch to tacos, sandwiches, salads, and more. This recipe uses readily available ingredients and a simple brining process.
Ingredients
-
2 medium red onions ((or 3 small ones))
-
1 1/4 cup water
-
1 1/4 cup white vinegar
-
3 tbsp sugar (of choice)
-
1 tbsp sea salt
-
1/4-1/2 tsp red pepper flakes ((optional))
Instructions
-
Step 1
Thinly slice the red onions. A mandoline or sharp knife works well. -
Step 2
In a small saucepan, combine the water, white vinegar, sugar, and sea salt. Stir until the sugar and salt are dissolved. -
Step 3
Bring the mixture to a simmer over medium heat. Remove from heat once simmering. -
Step 4
Place the sliced red onions into a clean jar or heatproof container. Add the optional red pepper flakes if using. -
Step 5
Pour the hot pickling liquid over the onions, ensuring they are fully submerged. -
Step 6
Let the mixture cool to room temperature, then cover and refrigerate. The onions will be ready to eat in about 30 minutes, but are best after a few hours or overnight.
Important Information
Nutrition Facts (Per Serving)
It is important to consider this information as approximate and not to use it as definitive health advice.
Allergy Information
Please check ingredients for potential allergens and consult a health professional if in doubt.