Easy Japanese Tuna Onigiri Quick Recipe
15-min. Easy Japanese Tuna Onigiri is your new go-to for a quick, satisfying, and incredibly delicious meal or snack. Have you ever craved that perfect bite that’s both comforting and bursting with flavor, all without spending hours in the kitchen? That’s exactly what these delightful rice balls deliver. People absolutely adore Japanese tuna onigiri for its simplicity and versatility. It’s a staple in bento boxes, a lifesaver for busy lunches, and a surprisingly elegant appetizer. What makes this particular 15-min. Easy Japanese Tuna Onigiri so special is the perfect balance of fluffy rice, savory, seasoned tuna, and that satisfying, handheld shape. It’s a taste of Japan made achievable for anyone, anytime. Get ready to master this effortless classic!
15-Min. Easy Japanese Tuna Onigiri
Welcome to a quick and delicious culinary adventure! Today, we’re making Japanese Tuna Onigiri, also known as rice balls. These little powerhouses are incredibly versatile, perfect for a speedy breakfast, a satisfying lunch on the go, or a light snack. What I love most about onigiri is their simplicity, and this tuna-filled version is a crowd-pleaser that comes together in about 15 minutes, especially if you have cooked rice ready to go. It’s a fantastic way to transform leftover rice into something truly special. Forget complicated techniques; we’re focusing on flavor and speed here. Let’s dive in!
Ingredients:
Cooking Instructions
Step 1: Prepare the Tuna Filling
The first step is to create our flavorful tuna filling. Open your can of tuna and drain it thoroughly. If you’re using tuna packed in oil, draining it well is important to prevent the onigiri from becoming too greasy. If you’re using tuna in water, make sure to squeeze out as much moisture as possible. In a small bowl, combine the drained tuna with the Japanese mayonnaise. If you don’t have Japanese mayonnaise, regular mayonnaise will work just fine, though Japanese mayo often has a richer, tangier flavor that pairs beautifully with tuna. Mix everything together until the tuna is well coated and combined with the mayo. This simple mixture is incredibly satisfying and forms the heart of our onigiri. You can also add a tiny pinch of black pepper if you like, though it’s not strictly traditional.
Step 2: Season and Prepare the Rice
Now, let’s get our rice ready. If your rice is still warm, great! If it has cooled down, gently warm it up a bit. It’s easier to shape rice when it’s still slightly warm, as it becomes more pliable. In a bowl, combine the 2 cups of cooked short-grain rice with the 1/2 teaspoon of salt. Gently mix the salt into the rice. You want to distribute it evenly without mashing the rice grains. Short-grain rice is ideal for onigiri because of its stickiness, which helps the rice balls hold their shape. If you don’t have short-grain rice, any medium-grain rice can be used in a pinch, but the texture might be slightly different.
Step 3: Shape the Onigiri – The Fun Part!
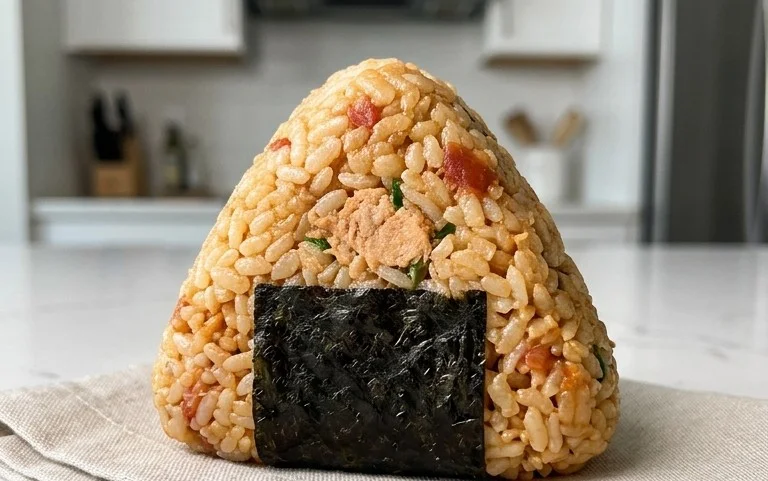
This is where the magic happens! It’s important to work with slightly damp hands to prevent the rice from sticking to you. Dip your hands in water and then shake off any excess. Take about half a cup of the seasoned rice and place it in the palm of your hand. Gently flatten it into a disc. Now, make a small indentation in the center of the rice disc. This is where your delicious tuna filling will go. Spoon about a tablespoon of the tuna mixture into the indentation. Don’t overfill it, or it will be difficult to seal. Now, carefully gather the edges of the rice around the filling, enclosing it completely. Gently press and shape the rice into a triangle, ball, or cylinder – whatever shape you prefer! Continue to gently pat and turn the rice ball, ensuring it’s firm but not packed too tightly, so the grains don’t break. Repeat this process with the remaining rice and tuna filling until you have used it all up. You should be able to make about 2-3 onigiri from this amount of rice.
Step 4: Wrap with Nori and Garnish
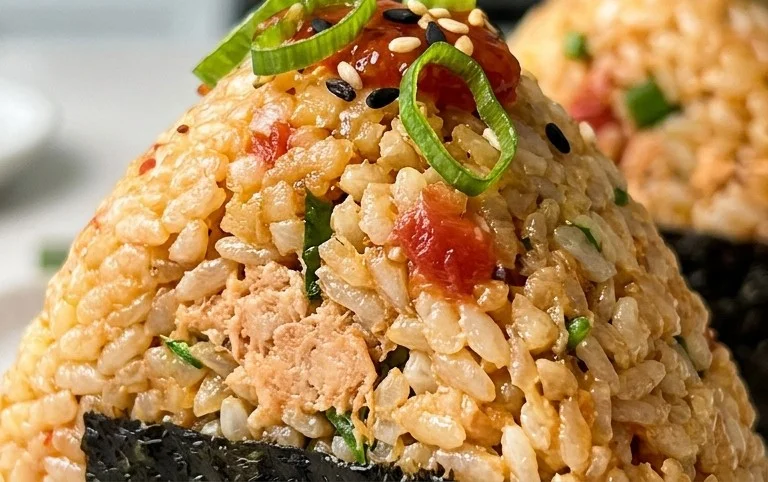
Once your rice balls are shaped, it’s time to add that signature touch of nori. If you are using full sheets of nori, you can cut them into strips. A common way to wrap onigiri is to place a strip of nori along the bottom edge of the rice ball, extending up the sides. This not only looks appealing but also provides a convenient handle for eating. If you prefer less nori, you can simply tear small pieces and adhere them to the rice. For a beautiful finish, if you’re feeling fancy, you can sprinkle some of the optional sesame seeds onto the top of the onigiri. This adds a lovely nutty flavor and visual appeal. You can also lightly press the sesame seeds into the surface of the rice if you wish.
Step 5: Enjoy Your Homemade Onigiri!
And there you have it! Perfectly formed, delicious Japanese Tuna Onigiri ready to be enjoyed. These are best eaten fresh, but they also store well in an airtight container for a few hours. If you’re taking them on the go, you can wrap them individually in plastic wrap to keep them fresh and prevent them from drying out. You can serve these as is, or alongside a small side of soy sauce for dipping if you desire. This recipe is incredibly adaptable. Feel free to experiment with different fillings! Other popular options include salted salmon, pickled plums (umeboshi), or even seasoned cooked chicken. The possibilities are endless, but this tuna and mayo combination is a classic for a reason. Enjoy the satisfaction of making something so tasty and convenient all by yourself!
Conclusion:
You’ve just discovered the secret to whipping up delicious and satisfying Japanese Tuna Onigiri in under 15 minutes! This recipe is a game-changer for busy weeknights, quick lunches, or whenever you need a speedy yet flavorful snack. The beauty of this tuna onigiri lies in its simplicity, the satisfying combination of fluffy rice and savory tuna filling, and its incredible versatility. It’s the perfect canvas for endless flavor combinations, making it a staple I return to again and again.
These little rice balls are fantastic on their own, but they also shine when paired with a light miso soup, a crisp salad, or even some pickled gin extractger for an extra zing. Don’t be afraid to get creative with your fillings! Consider adding finely chopped scallions, a dash of sriracha for heat, or even some furikake for an extra layer of flavor and texture. I truly encourage you to give this 15-min. Easy Japanese Tuna Onigiri recipe a try; I’m confident you’ll love how effortlessly you can create this classic Japanese comfort food.
Frequently Asked Questions:
Can I make the rice ahead of time?
Absolutely! For even faster assembly, you can cook your sushi rice in advance and let it cool completely. Just be sure to gently reheat it or bring it closer to room temperature before shaping your onigiri, as cold rice can be a bit difficult to work with and less appealing in texture.
What kind of tuna is best?
Canned tuna packed in oil or water both work wonderfully. Draining it well is key to preventing a soggy filling. Some people prefer tuna in oil for a richer flavor, while tuna in water offers a lighter option.
Can I make this vegan?
While this specific recipe focuses on tuna, you can easily adapt the concept! For a vegan version, consider fillings like seasoned mashed edamame, pickled mushrooms, or a mix of finely chopped vegetables sautéed with soy sauce.
15-min. Easy Japanese Tuna Onigiri
Quick and simple Japanese rice balls filled with seasoned tuna and mayonnaise, wrapped in nori. Perfect for a light meal or snack.
Ingredients
-
{‘@type’: ‘Ingredient’, ‘name’: ‘cooked short grain rice’, ‘quantity’: ‘2’, ‘unitCode’: ‘cup’}
-
{‘@type’: ‘Ingredient’, ‘name’: ‘salt’, ‘quantity’: ‘1/2’, ‘unitCode’: ‘tsp’}
-
{‘@type’: ‘Ingredient’, ‘name’: ‘canned tuna (in oil recommended, or canned tuna in water)’, ‘quantity’: ‘5.29’, ‘unitCode’: ‘oz’}
-
{‘@type’: ‘Ingredient’, ‘name’: ‘Japanese mayo (or regular mayonnaise)’, ‘quantity’: ‘2’, ‘unitCode’: ‘tbsp’}
-
{‘@type’: ‘Ingredient’, ‘name’: ‘nori’, ‘quantity’: ‘2’, ‘unitCode’: ‘sheets’}
-
{‘@type’: ‘Ingredient’, ‘name’: ‘sesame seeds (for garnishing, optional)’, ‘quantity’: ‘1’, ‘unitCode’: ‘tsp’}
Instructions
-
Step 1
Drain the canned tuna very well. In a small bowl, mix the drained tuna with Japanese mayonnaise and salt until combined. -
Step 2
In a separate bowl, gently mix the cooked short grain rice with the salt. Make sure the rice is still warm but cool enough to handle. -
Step 3
Wet your hands with water and sprinkle a little salt on your palms to prevent sticking. Take a portion of rice and flatten it into a disc in your palm. -
Step 4
Place a spoonful of the tuna mixture in the center of the flattened rice. Carefully fold the rice around the filling, forming a compact ball or triangle shape. Repeat with remaining rice and filling. -
Step 5
Cut the nori sheets into strips. Wrap a strip of nori around the base of each onigiri. If using, sprinkle sesame seeds over the onigiri for garnish.
Important Information
Nutrition Facts (Per Serving)
It is important to consider this information as approximate and not to use it as definitive health advice.
Allergy Information
Please check ingredients for potential allergens and consult a health professional if in doubt.