Easy Punch Bowl Cake Recipe – Delicious Dessert
Punch bowl cake isn’t just a dessert; it’s an experience. Imagin extracte this: a towering confection, bursting with vibrant colors and an irresistible array of textures, all nestled cozily within the very vessel it’s named after. It’s the centerpiece that steals the show at every gathering, the dessert everyone talks about long after the last crum extractb has been devoured. Why do we love this delightful creation so much? It’s the sheer joy and nostalgia it evokes, reminding us of simpler times and festive celebrations. But what truly sets this punch bowl cake apart is its incredible versatility. It’s a blank canvas for your culinary imagin extractation, a spectacular way to layer your favorite flavors into one stunning, shareable masterpiece. Get ready to assemble your very own show-stopping punch bowl cake, and prepare for the accolades!
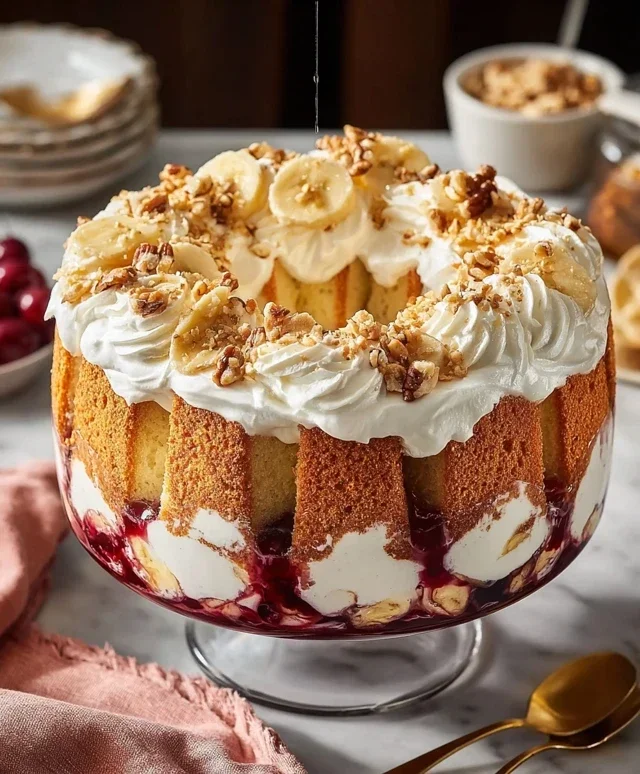
The Ultimate Punch Bowl Cake Recipe
There are some desserts that just scream celebration, and the Punch Bowl Cake is undoubtedly one of them. This layered masterpiece, often mistaken for a trifle but with its own unique charm, is as visually stunning as it is delicious. Its vibrant colors and sweet, fruity flavors make it a guaranteed crowd-pleaser at any gathering, from casual potlucks to elegant holiday parties. The beauty of this cake lies in its simplicity, relying on store-bought shortcuts to create a stunning dessert without hours of complicated baking. Let’s dive into how you can create this show-stopping dessert yourself!
Ingredients:
Baking the Cake
The foundation of our Punch Bowl Cake is a perfectly baked yellow cake. Don’t be intimidated if you’re not a seasoned baker; this part is incredibly straightforward.
1. Preheat your oven according to the cake mix package directions, usually around 350°F (175°C). While the oven heats, lightly grease and flour a 9×13 inch baking pan. This ensures your cake releases easily once baked. In a large mixing bowl, combine the yellow cake mix, 1 cup of water, ½ cup of vegetable oil, and the 3 large eggs. It’s important to have your eggs at room temperature for better emulsification, leading to a lighter, more tender cake. Whisk or beat with an electric mixer on medium speed for about 2 minutes, until the batter is smooth and well combined. Don’t overmix, as this can result in a tough cake. Pour the batter evenly into the prepared baking pan. Bake for the time recommended on the cake mix box, typically 30-35 minutes, or until a wooden skewer or toothpick inserted into the center comes out clean. Once baked, let the cake cool in the pan for about 10-15 minutes before inverting it onto a wire rack to cool completely. This gentle cooling process prevents the cake from breaking.
Preparing the Pudding and Fruit Layers
While your cake cools, we’ll prepare the creamy pudding and the delicious fruit components that will give our Punch Bowl Cake its signature flavor and texture.
2. In a separate large bowl, prepare the instant vanilla pudding. Whisk together the 6.8 ounces of instant vanilla pudding mix and 4 cups of cold whole milk. It’s crucial to use cold milk for the pudding to set properly. Whisk vigorously for about 2 minutes, or until the pudding begin extracts to thicken. Let the pudding stand for about 5 minutes to allow it to set completely. While the pudding is setting, drain your crushed pineapple very well. Excess liquid can make the cake soggy. You can gently press it in a colander or even wrap it in cheesecloth to remove as much moisture as possible. Slice your 4 medium bananas. It’s best to slice them just before you plan to assemble the cake to prevent them from browning too much.
Assembling the Masterpiece
Now comes the fun part: layering all these delicious components to create our stunning Punch Bowl Cake. A clear glass punch bowl is ideal for this dessert, as it allows the vibrant layers to be seen.
3. Once your yellow cake is completely cool, you’ll want to prepare it for layering. I like to crum extractble the cooled cake into bite-sized pieces. You can do this by hand or use a fork to gently break it apart. Place about half of these cake crum extractbles at the bottom of your clear punch bowl, creating an even layer. This will be the base of our cake. Now, generously spoon about half of the prepared vanilla pudding over the cake crum extractbles. Don’t be shy; we want a good amount of creamy pudding throughout.
4. Next, evenly distribute about half of the well-drained crushed pineapple over the pudding layer. This adds a burst of tropical sweetness and a delightful texture. Following the pineapple, arrange about half of the sliced bananas on top. Try to spread them out evenly so you get banana in every serving. This is where the “punch bowl” aspect really starts to come alive, with the distinct layers becoming visible.
5. Now, we’ll repeat the layering process to build our cake even higher. Add the remaining half of the crum extractbled yellow cake on top of the banana layer. Spoon another generous layer of the vanilla pudding over the second cake layer. Then, carefully spoon the entire 42 ounces of cherry pie filling over the pudding. The deep red of the cherry pie filling is what really gives this cake its festive and eye-catching appearance. Gently spread it out to create a beautiful, uniform red layer. Finally, arrange the remaining sliced bananas over the cherry pie filling.
The Finishing Touches
The final layers are all about creamy sweetness and a delightful crunch. This is where our Punch Bowl Cake truly becomes irresistible.
6. Once all the fruity and cakey layers are in place, it’s time for the crowning glory: the whipped topping. Gently spread the 16 ounces of thawed whipped topping evenly over the entire top layer of the cake and fruit. You can create swirls or peaks with your spatula for a more decorative finish. This light and airy layer provides a beautiful contrast to the denser layers below. For a final touch of flavor and texture, sprinkle the ⅓ cup of chopped pecans over the whipped topping. The pecans add a welcome nutty crunch that complements the sweetness of the cake and fruit.
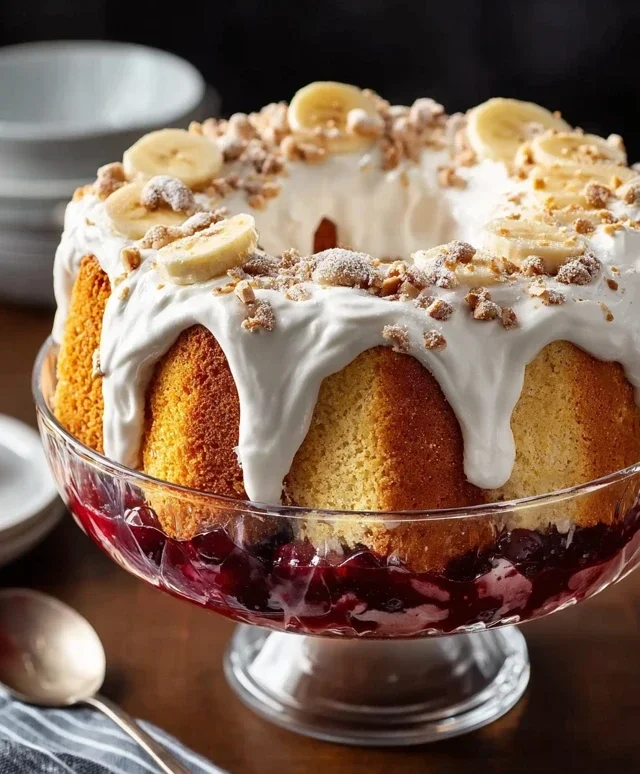
To allow the flavors to meld and the pudding to set even further, it’s highly recommended to cover the punch bowl tightly with plastic wrap and refrigerate the cake for at least 2-3 hours, or ideally overnight, before serving. This chilling time is essential for the best flavor and texture. When you’re ready to serve, simply scoop generous portions into bowls, ensuring each serving gets a good mix of all the delicious layers. Enjoy this delightful and visually impressive Punch Bowl Cake!
Conclusion:
So there you have it! This punch bowl cake recipe is an absolute showstopper for any gathering. Its effortless assembly means you can create a visually stunning and incredibly delicious dessert without spending hours in the kitchen. The layers of moist cake, creamy pudding, and fruity goodness create a symphony of flavors and textures that everyone will adore. Whether you’re hosting a birthday party, a potluck, or just want to treat yourself, this punch bowl cake is guaranteed to impress and disappear quickly!
We’ve explored how this recipe is fantastic for its ease and adaptability. You can serve it directly from the punch bowl for a communal feel, or portion it into individual glasses for a more elegant presentation. Don’t be afraid to experiment with different cake flavors, such as chocolate or spice cake, and swap out the pudding for lemon or cheesecake varieties. Fresh berries, canned pineapple, or even some crunchy nuts can add exciting new dimensions. I truly encourage you to give this punch bowl cake a try – you won’t regret it!
Frequently Asked Questions:
Can I make this punch bowl cake ahead of time?
Absolutely! In fact, making it a few hours or even the night before allows the flavors to meld beautifully and the cake to soften just right. Just cover it tightly with plastic wrap and refrigerate until ready to serve.
What’s the best type of punch bowl to use?
A clear glass punch bowl is ideal as it showcases the beautiful layers of the cake. However, any large, attractive bowl will work just fine. The key is to have a vessel that can hold all those delicious layers!
Can I use store-bought cake and pudding?
Yes, using store-bought components is a fantastic shortcut that makes this recipe even quicker to assemble. The goal is deliciousness and ease, so feel free to customize with your favorite convenient options.
Punch Bowl Cake
A classic layered dessert featuring moist yellow cake, creamy vanilla pudding, sweet fruits, and whipped topping.
Ingredients
-
15.25 ounces yellow cake mix
-
1 cup water
-
½ cup vegetable oil
-
3 large eggs, room temperature
-
6.8 ounces instant vanilla pudding mix
-
4 cups cold whole milk
-
40 ounces crushed pineapple, well-drained
-
4 medium bananas, sliced
-
42 ounces cherry pie filling
-
16 ounces whipped topping, thawed
-
⅓ cup chopped pecans
Instructions
-
Step 1
Prepare the yellow cake according to package directions using the water, vegetable oil, and eggs. Bake in a 9×13 inch pan. Let cool completely, then crumble into bite-sized pieces. -
Step 2
While the cake cools, prepare the vanilla pudding by whisking together the instant vanilla pudding mix and cold whole milk until thickened. Let it set for a few minutes. -
Step 3
In a large punch bowl or serving dish, create the first layer by placing half of the crumbled cake. -
Step 4
Top the cake layer with half of the drained crushed pineapple, half of the sliced bananas, and half of the cherry pie filling. -
Step 5
Spread half of the prepared vanilla pudding evenly over the fruit layer. -
Step 6
Repeat the layers: remaining crumbled cake, remaining crushed pineapple, remaining sliced bananas, remaining cherry pie filling, and remaining vanilla pudding. -
Step 7
Spread the thawed whipped topping over the final pudding layer and sprinkle with chopped pecans. -
Step 8
Chill for at least 2 hours before serving to allow the flavors to meld.
Important Information
Nutrition Facts (Per Serving)
It is important to consider this information as approximate and not to use it as definitive health advice.
Allergy Information
Please check ingredients for potential allergens and consult a health professional if in doubt.