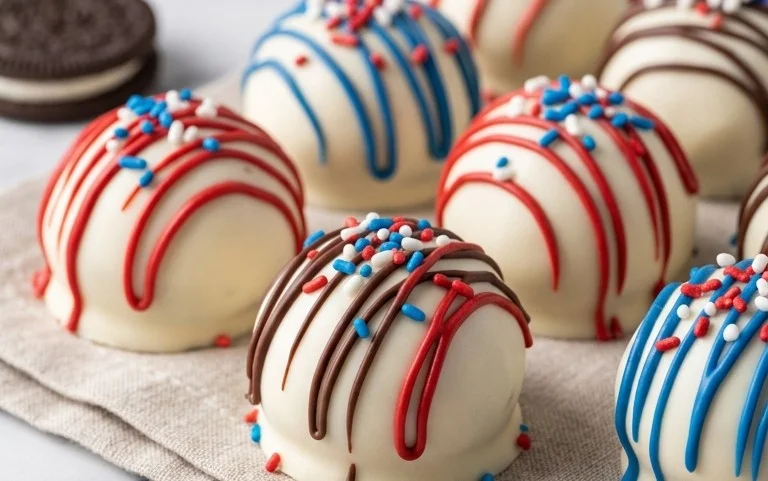
Patriotic Oreo Balls- Easy Red White Blue Dessert
Patriotic Oreo Balls are the ultimate sweet treat to ignite your holiday spirit! Whether you’re celebrating the Fourth of July, Memorial Day, or any occasion that calls for a touch of red, white, and blue, these delightful no-bake wonders are sure to be a crowd-pleaser. What makes these Patriotic Oreo Balls so irresistible? It’s the perfect marriage of crushed Oreos and creamy goodness, rolled into bite-sized spheres and then adorned with vibrant patriotic colors. They’re incredibly easy to make, which means less time in the kitchen and more time enjoying the festivities with loved ones. Everyone raves about them because they’re a delightful explosion of chocolatey flavor with a festive flair. We’ll show you exactly how to create these show-stopping treats that will have everyone asking for the recipe!
Red, White, and Blue Bliss: Easy Patriotic Oreo Balls
Get ready to celebrate any patriotic holiday or just brighten your day with these incredibly simple yet stunning Patriotic Oreo Balls! These no-bake treats are a crowd-pleaser, perfect for parties, picnics, or just because. The combination of classic Oreo cookies, creamy cheese, and vibrant candy coating is irresistible, and with a little red, white, and blue flair, they become a festive masterpiece.
Ingredients:
Crafting Your Festive Delights
These Oreo balls are incredibly forgiving and fun to make, even for begin extractners. The key is to have all your ingredients prepped and ready before you start. Softening the cream cheese is crucial – it makes mixing so much easier and ensures a smooth, lump-free base. If you forget to leave it out, a quick trick is to cut the cream cheese into smaller cubes and let them sit on the counter for about 15-20 minutes, or pop them in the microwave for 10-second intervals, checking frequently until just softened.
The process of crushing the Oreos can be done in a food processor, which is the quickest and most efficient method. You want a fine crum extractb, almost like sand, but it’s okay if there are a few tiny, barely noticeable chunks. If you don’t have a food processor, no worries! You can place the Oreos in a large zip-top bag and use a rolling pin to crush them into fine crum extractbs. Just be sure to seal the bag well to avoid a cookie crum extractb explosion in your kitchen!
Now, let’s get to the fun part – assembling these delicious patriotic treats!
Step 1: The Oreo Base
The first step to creating these delightful treats is to transform your family-size package of Oreo cookies into fine crum extractbs. Open your food processor and add the entire package of Oreos, including the creme filling. Pulse the processor until the cookies are crushed into very fine crum extractbs. You’re aiming for a texture that’s similar to sand. If you’re using a zip-top bag and a rolling pin, make sure to get the crum extractbs as fine as possible. Transfer these fine crum extractbs into a large mixing bowl.
Step 2: Creamy Binding
Next, it’s time to bring our Oreo crum extractbs to life with the magic of cream cheese. Add the 8-ounce block of softened cream cheese to the bowl of Oreo crum extractbs. Using a sturdy spoon or your hands (clean hands are best here!), mix the cream cheese into the Oreo crum extractbs until it is thoroughly combined. You want to achieve a consistency that is moist enough to hold together when squeezed, but not overly sticky. It should resemble a thick dough. Squeeze a small amount in your hand; if it holds its shape without crum extractbling, you’re on the right track. If it seems too dry and crum extractbly, you can add another tablespoon of softened cream cheese and mix again. Conversely, if it’s too wet, you can add a few more crushed Oreo crum extractbs, a tablespoon at a time, until the desired consistency is reached. This mixture is the heart of your Oreo balls, so take your time to ensure it’s well incorporated.
Step 3: Rolling the Balls
Now comes the satisfying part of shaping your Oreo balls. Take small portions of the Oreo and cream cheese mixture, about a tablespoon in size, and roll them between your palms to form uniform balls. Aim for them to be about 1-inch in diameter. It’s helpful to roll them evenly so they all bake or set at a similar rate if you were baking, though these are no-bake! As you roll each ball, place it on a baking sheet lined with parchment paper or wax paper. This prevents them from sticking and makes them easier to handle later. Continue this process until all the mixture has been rolled into balls. You should have a good number of delightful little spheres ready for their colorful transformation.
Step 4: The Patriotic Coating
This is where the true patriotic spirit comes alive! You’ll need to melt your candy melts and white chocolate wafers. You can do this using a microwave or a double boiler. For the microwave, place each color of candy melts and the white wafers in separate microwave-safe bowls. Microwave on 50% power for 30-second intervals, stirring well after each interval, until completely melted and smooth. Be careful not to overheat, as candy melts can seize up. For a double boiler, place each type of candy in a heatproof bowl set over a saucepan of simmering water. Stir constantly until melted and smooth.
Dip each Oreo ball into one of the melted candy colors. You can use a fork or a dipping tool to fully submerge the balls. Let the excess chocolate drip back into the bowl before returning the coated ball to the parchment-lined baking sheet. For the white chocolate, you can use it to create stripes or drizzle patterns over the red and blue coated balls. To do this, melt the Ghirardelli white melting wafers as described above. Once melted, place it in a piping bag with a small round tip, or a zip-top bag with a tiny corner snipped off.
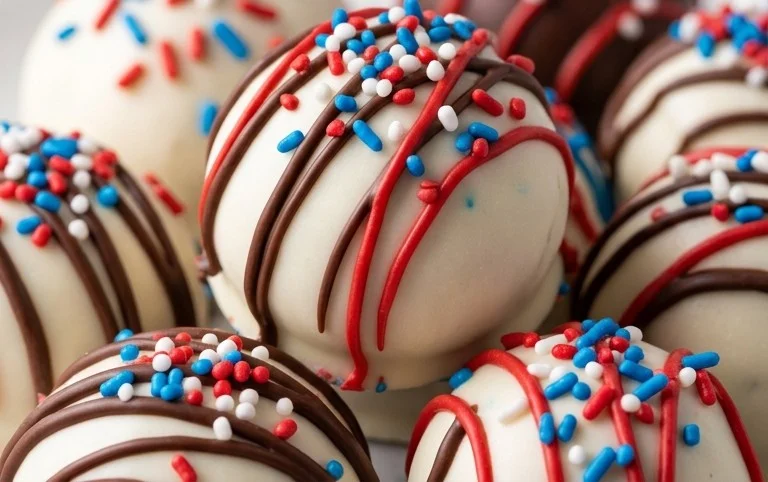
Step 5: Adding the Stars and Stripes (and Sparkle!)
This is the final flourish that makes your Oreo balls truly festive. Once you’ve dipped your balls in either red or blue candy melts, and while the coating is still wet, immediately sprinkle them with the white star confetti sprinkles. If you’re going for a more intricate design, allow the initial red or blue coating to set slightly. Then, use the melted white chocolate to drizzle stripes or create a marbled effect over the red or blue. You can also dip half of the balls in red and the other half in blue. For a patriotic swirl effect, you can even dip the balls halfway in red, then halfway in blue, letting the colors slightly blend at the halfway point. Once you’ve applied your desired decorations, allow the candy coating to set completely. You can speed this up by placing the baking sheet in the refrigerator for about 15-20 minutes.
Once hardened, your Patriotic Oreo Balls are ready to be enjoyed! Store them in an airtight container at room temperature or in the refrigerator. They are best enjoyed within a week. Happy celebrating!
Conclusion:
And there you have it – your delicious, show-stopping Patriotic Oreo Balls are ready to impress! This recipe is truly fantastic because it’s incredibly simple to make, requires no baking, and delivers an explosion of festive flavor and fun. They’re the perfect sweet treat for any summer gathering, from backyard BBQs to Fourth of July celebrations, or even just a sweet way to add some red, white, and blue to your day. The creamy, decadent center made from crushed Oreos and cream cheese, dipped in vibrant chocolate, is a guaranteed crowd-pleaser. Get creative with your decorating – sprinkles, drizzles, and edible glitter can all enhance their patriotic charm!
I highly encourage you to give these Patriotic Oreo Balls a try. They’re a delightful and easy way to celebrate any occasion. Don’t be afraid to experiment with different color combinations or even add a hint of flavoring to your chocolate coating. These are also fantastic for making ahead, as they store beautifully, making them an ideal stress-free dessert for busy hosts.
Frequently Asked Questions:
Can I make these ahead of time?
Absolutely! Patriotic Oreo Balls are perfect for making in advance. Once they’re set, you can store them in an airtight container in the refrigerator for up to a week. They might even taste better after a day, as the flavors meld together!
What are some other serving suggestions?
These delightful treats are fantastic on their own, but they also make a wonderful addition to a dessert platter, a sweet ending to a cookout, or even a fun-themed party favor. Consider serving them alongside fresh berries or a scoop of vanilla ice cream for an extra special treat.
Can I use different types of cookies besides Oreos?
While the classic Oreo provides that signature flavor and texture, you can certainly experiment! Chocolate chip cookies, shortbread, or even grabeef ham crackers could be used as a base for a different, but still delicious, variation. Just be sure to adjust the cream cheese amount slightly if the cookie crum extractbs are drier or more absorbent.
Patriotic Oreo Balls
Festive no-bake Oreo balls decorated in red, white, and blue for a patriotic treat. Perfect for holidays and celebrations.
Ingredients
-
1 lb 2.12 oz Family Size package Oreo Cookies
-
8 ounce block cream cheese, softened to room temperature
-
12 ounce bag red candy melts
-
12 ounce bag blue candy melts
-
⅓ cup Ghirardelli white melting wafers
-
White star confetti sprinkles for topping
Instructions
-
Step 1
Crush Oreo cookies into fine crumbs using a food processor or by placing them in a zip-top bag and crushing with a rolling pin. -
Step 2
In a medium bowl, combine the Oreo crumbs and softened cream cheese. Mix until well combined and a dough-like consistency forms. -
Step 3
Roll the mixture into small balls, about 1 inch in diameter. Place on a baking sheet lined with parchment paper. -
Step 4
Melt the red candy melts and blue candy melts separately in microwave-safe bowls, stirring every 30 seconds until smooth. Melt the Ghirardelli white melting wafers separately. -
Step 5
Dip each Oreo ball into the melted candy coatings, ensuring full coverage. You can alternate colors for a patriotic effect. Drizzle with contrasting colors if desired. -
Step 6
While the candy coating is still wet, sprinkle with white star confetti sprinkles. Let the excess drip off. -
Step 7
Place the decorated Oreo balls back on the parchment-lined baking sheet and refrigerate for at least 30 minutes, or until the candy coating is firm.
Important Information
Nutrition Facts (Per Serving)
It is important to consider this information as approximate and not to use it as definitive health advice.
Allergy Information
Please check ingredients for potential allergens and consult a health professional if in doubt.